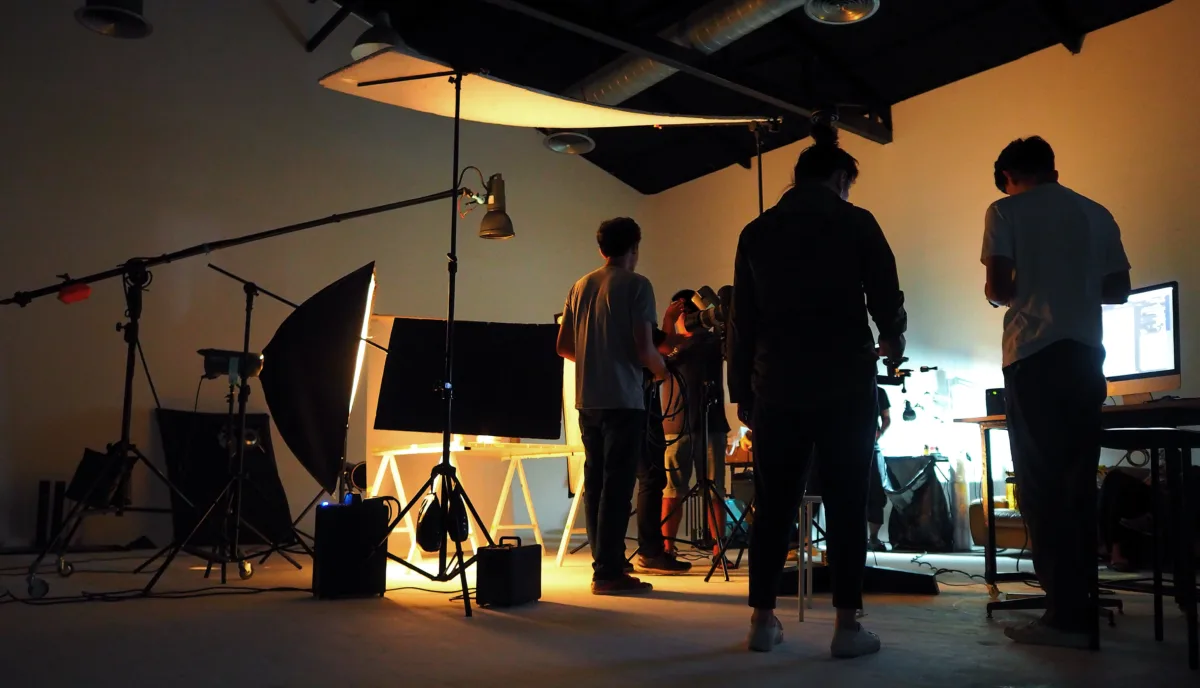
Welcome to the exciting world of video production, where everything is possible, and nothing is out of reach! If you’re looking to take your video content to the next level, you’re in the right place. Today, we’re going to talk about one of the most important concepts in video production: production value.
In a nutshell, production value is the overall quality of your video content. It’s the combination of all the elements that go into making a video, including the lighting, sound, camera work, editing, and more. When all of these elements come together seamlessly, you have a high production value video that engages your audience and leaves a lasting impression.
how do you use production value to your advantage?
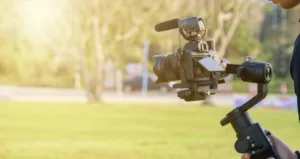
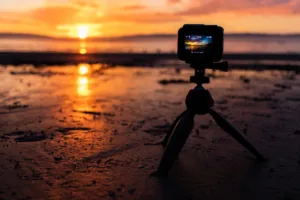
First and foremost, it’s essential to invest in the right equipment. A high-quality camera, lighting equipment, and microphones can make all the difference in the world. These items may seem like a significant investment upfront, but the payoff in the quality of your content is worth it.
Next, it’s essential to pay attention to the details. Simple things like framing your shots correctly, using appropriate lighting, and capturing high-quality sound can make a massive difference in your final product. Take the time to plan your shots, think about your lighting, and capture great sound. It will pay off in the end.
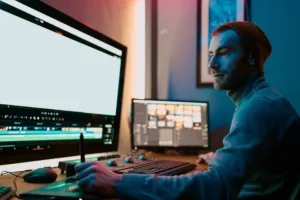
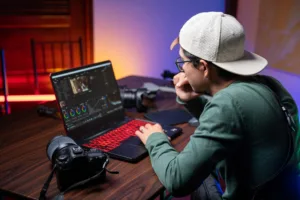
Another crucial aspect of production value is post-production. Editing can take your footage to the next level, adding music, sound effects, and other elements that help tell your story. Take the time to learn about editing software and techniques that can help you create a polished final product.
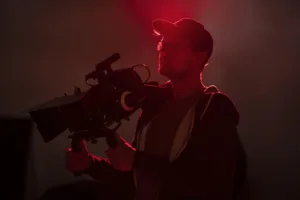
When it comes to creating the perfect lighting setup, there are a lot of different factors to consider. One key element to keep in mind is the importance of fill lighting. This type of lighting serves a very specific purpose – it is placed on the opposite side of the key light and used to fill in any shadows that are created by that light source.
The goal is to create a more balanced and flattering look, by ensuring that your subject is effectively illuminated from all angles. To achieve this, fill lighting is usually set at a lower intensity than the key light – this helps to prevent any harsh or overwhelming effects that could potentially detract from the overall aesthetic of the shot.
Whether you’re shooting stills or video, mastering the art of fill lighting can make a big difference in the final outcome of your visual content.
Conclusion.
In summary, production value is all about creating high-quality video content that engages your audience and leaves a lasting impression. By investing in the right equipment, paying attention to the details, and taking the time to edit your footage, you can create a video that stands out and makes an impact. So go out there and create something amazing!
Hey there! Are you ready to learn about 3-point lighting in filmmaking? Let’s dive into it!
Have you ever watched a movie or a video and wondered why the actors look so good on camera? One of the reasons is likely due to proper lighting, specifically the use of 3-point lighting.
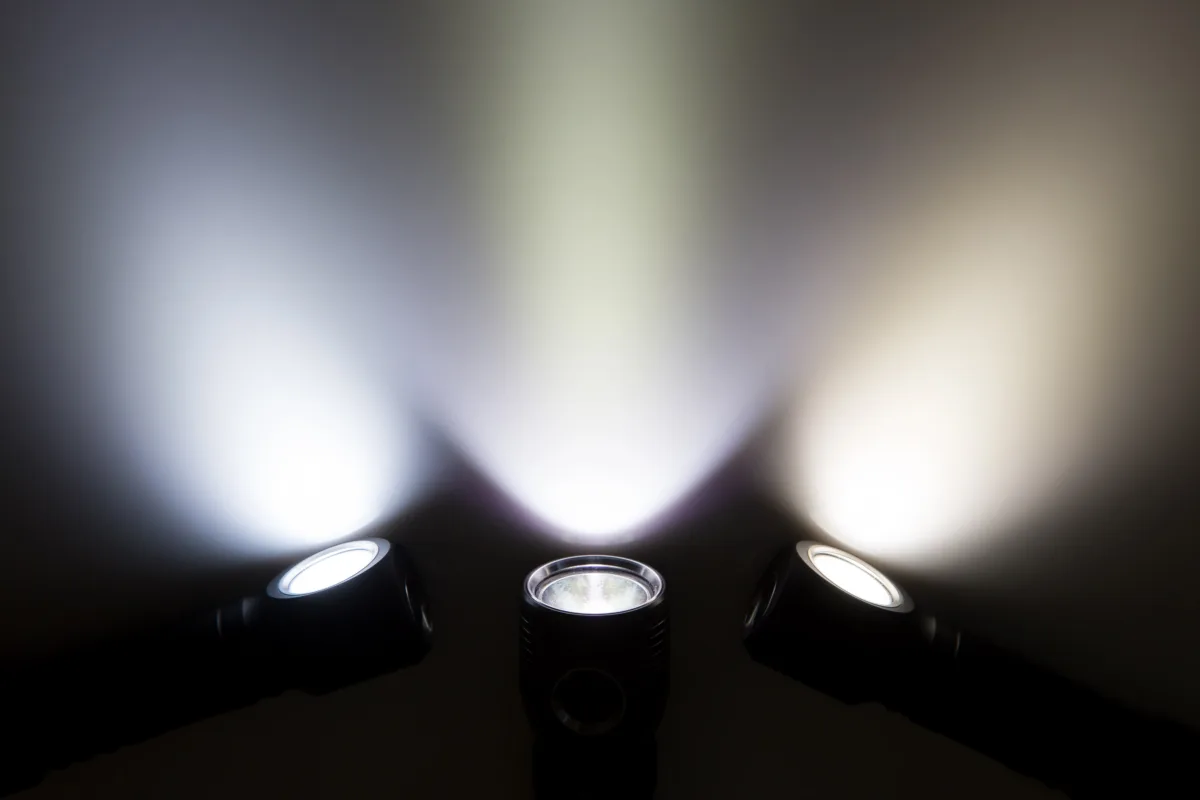
So, what is 3-point lighting? It is a lighting technique that uses three different lights positioned in a specific way to create a balanced and dynamic look for your subject. The three lights are:
Key light.
The key light is an essential element in lighting for photography, film, and other visual arts. It serves as the primary illumination for the subject of the scene, and it is usually placed at an angle of 45-degrees from the camera’s viewpoint.
This way, it creates shadows and highlights that contribute to the overall tone and mood of the picture. The position of the key light can change depending on the desired effect and the number of subjects in the scene. Its brightness can also vary based on the conditions of the environment and the desired style of the shoot.
In short, the key light is a critical tool for any photographer or filmmaker to master in order to achieve stunning visual results.
Fill light.
When it comes to creating the perfect lighting setup, there are a lot of different factors to consider. One key element to keep in mind is the importance of fill lighting. This type of lighting serves a very specific purpose – it is placed on the opposite side of the key light and used to fill in any shadows that are created by that light source.
The goal is to create a more balanced and flattering look, by ensuring that your subject is effectively illuminated from all angles. To achieve this, fill lighting is usually set at a lower intensity than the key light – this helps to prevent any harsh or overwhelming effects that could potentially detract from the overall aesthetic of the shot.
Whether you’re shooting stills or video, mastering the art of fill lighting can make a big difference in the final outcome of your visual content.
Backlight.
The use of backlighting is an effective technique in photography that is aimed at creating a clear separation between the subject and the background. It involves placing the light source behind the subject, which helps to enhance the quality of the shot. Apart from the separation, backlighting is also useful in adding depth to the shot, which contributes to creating a more three-dimensional aspect to the subject.
Furthermore, the use of backlighting can produce a natural-looking highlight around the edges of the subject, which gives it a more polished and refined appearance. By employing this technique in your photography, you can add an extra dimension of interest and appeal to your shots, allowing them to stand out from the rest and capture the attention of your viewers.
By using 3-point lighting, you can create a polished and professional look to your video. It can be used in a variety of settings, from interviews to product shots to narrative filmmaking.
So, how do you use 3-point lighting in your own videos? Here are some quick tips:
Set up your key light first, making sure it is positioned at a 45-degree angle to the subject.
Add your fill light to the opposite side of the key light and adjust the intensity as needed.
Place your backlight behind the subject and adjust the intensity as needed.
Play around with the positioning and intensity of each light until you achieve the desired look.
Conclusion.
Creating visually appealing videos is important for capturing your audience’s attention and keeping them engaged. A great way to achieve this is by using 3-point lighting, a technique commonly used in film and television production. By incorporating this technique into your own videos, you can improve the overall quality of your visual content.
To get started, try using a key light to highlight your subject, a fill light to provide balanced lighting, and a backlight to add depth to your shot. With a little bit of practice, you’ll be able to master this technique and improve the overall look and feel of your videos.
So why not give it a try today and see the difference it can make in your content creation? We wish you the best of luck and happy filming!
Greetings and salutations, my esteemed and beloved YouTube colleagues! I hope that this message finds you well and that you are not feeling overwhelmed or disheartened by the plethora of esoteric and highfalutin video editing terms that seem to saturate the digital landscape. Fear not, my dear friends; for I have come to offer my warm and reassuring presence as your dedicated and reliable mentor and guide, as you navigate the treacherous and complex terrain of the video editing world. The Top 15 Video Editing Terms every YouTuber needs to know.
For on this auspicious occasion, I shall impart unto thee, the invaluable knowledge and wisdom, of the top 15 must-know video editing terms that every budding YouTuber simply must familiarize themselves with, if they aspire to reign supreme in the exciting and competitive world of online video content creation. So, let us proceed forthwith, with unbridled ardor, and embark on a thrilling and engaging journey together, as we explore and unravel the mysteries of the art of video editing!
cut.
Video editing can seem daunting for beginners, but fear not! One of the most fundamental concepts in video editing is the cut. This involves removing a section of a clip, and can be used to remove unwanted footage, switch between different shots, or shorten a scene for better pacing. As you become more familiar with video editing, you’ll discover the many different types of cuts, such as jump cuts, match cuts, and J-cuts, which can all be used to achieve different effects and styles.
Whether you’re just starting out or have some experience under your belt, mastering the cut is an essential skill in creating polished and professional-looking videos. So why not give it a try and experiment with editing your own clips? You never know what kind of creative possibilities may arise.
Clip.
When producing a video, a crucial component is the utilization of a single video or audio file that is specifically selected to enhance the quality and impact of the project. Such a selection involves a rigorous process that ensures the chosen file matches the theme, message, and tone of the entire production. This single file extraction enables the author to minimize the time spent on searching for other unnecessary materials, thus ensuring that the finished product consists only of high-quality content that resonates with the viewers.
The singular selection of a video or audio file can have a significant impact on the delivery of your video project by increasing its effectiveness in achieving its intended purpose. Whether it’s a short-form video with a call to action or an in-depth documentary, this singular file can lead to a higher engagement rate and a more significant overall impact on your audience.
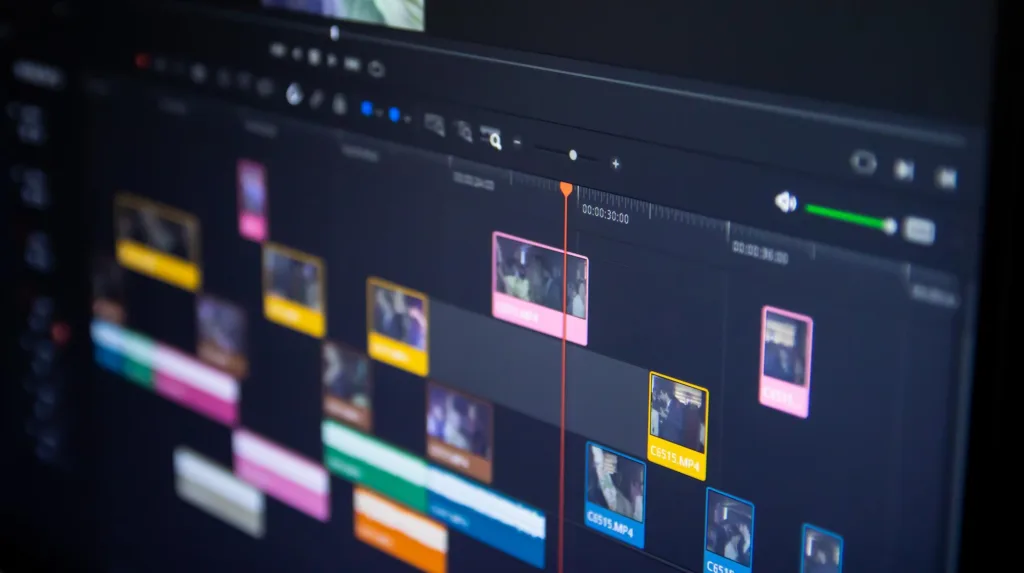
Timeline.
The section of your video editing software, known as the timeline, serves as a pivotal component that allows you to arrange and modify your video clips, images, audio tracks or any other media you may be utilizing in a sequential and cohesive manner. Essentially, it functions as an organized canvas, enabling you to cut, trim, add effects, transitions as well as audio – placings each piece in its desired position, essentially managing the flow, rhythm, and tempo of your video project.
By arranging your visual and audio content in a timeline, you can obtain the optimum structure and transition between your clips, ensuring a smooth and polished end result that your audience will watch with enthusiasm until the last frame. In summary, the timeline feature in your video editing software is a vital hub, facilitating the effective arrangement and modification of your visual, audio or any other media components for the most impactful final product possible.
Frame Rate.
Frames per second, commonly abbreviated as FPS, refers to the number of distinct images or frames that are displayed in a single second of video. A higher FPS value results in smoother motion and reduces blur, while a lower FPS can make movements appear choppy and jerky. Some of the standard frame rates used for video recordings are 24 frames per second, 30 frames per second, and 60 frames per second.
The choice of frame rate depends on the desired end result, with lower frame rates often used in classic films for their unique aesthetic appeal. Higher frame rates, such as 60 frames per second, are commonly used in video games and action-packed videos for their ability to capture fast-paced and dynamic movements with greater clarity and precision. Hence, the choice of frame rate can significantly impact the quality and impact of a video production.
Aspect ratio.
Aspect ratio refers to the proportional relationship between the width and height of your video. This means that it determines the shape and dimensions of your video frames. It is a crucial element to consider when creating or editing videos, as it affects the way in which your video appears on different devices and platforms.
There are several commonly used aspect ratios for videos, including 16:9 and 4:3. Each of these ratios has its own unique characteristics that impact how the video displays, such as the width and height of the video, its orientation, and the amount of space available for content. For instance, the 16:9 aspect ratio is widely used for widescreen TVs and computer monitors, while the 4:3 ratio was commonly used in older TVs and computer monitors.
keyframe.
A parameter is a specific value or setting that controls the behavior or appearance of an effect or animation. It is a crucial aspect in the creation and customization of these visual elements as it enables users to define the way they are displayed or activated at a particular time. Thus, when setting a parameter, you are essentially establishing a clear point in time where a specific effect or animation can be triggered, altered, or stopped to achieve the desired visual effect.
By carefully defining these parameters, designers and animators can create stunning visuals and communicate complex ideas through dynamic, engaging visuals that capture the audience’s attention. Whether used for entertainment, education, or promotional purposes, well-defined parameters are the cornerstone of effective visual communication.
Render.
The process of exporting your edited video project into a final video file can be a crucial step in completing your production. Exporting involves several different stages that allow you to choose the format, resolution, and quality of your final video. It is important to take some time to consider these choices carefully as they can have a significant impact on the overall look and feel of your video.
Additionally, exporting can take some time depending on the length and complexity of your project, so it is important to be patient during this stage of the production process. However, by taking the time to export your project properly, you can ensure that your final video will be of the highest quality and ready to be shared with your audience.
Color Grading.
Color grading is a highly important process in video production that involves making adjustments to the colors and tones in your footage. This is done with the intention of creating a particular look or mood that can enhance the visual experience for the viewer. The process can be accomplished through various methods, including manual color correction, the application of color grading presets, or the use of specialized software.
Proper color grading can impact the overall feel and tone of your video and can be used to evoke a wide range of emotions and reactions from your audience. Whether you’re looking to create a warm and inviting atmosphere or a dark and moody vibe, color grading can help you achieve your desired aesthetic and bring your video to life.
Chroma Key.
Chroma keying, also known as green screen or blue screen, is a powerful video-editing technique that allows you to creatively replace a specific color in a video clip with another image or video. By using specialized software and equipment, you can achieve a seamless integration between your subject and the background. This technique is popularly used in film and television production, as it offers limitless possibilities for creative storytelling and visual effects.
Whether you want to transport your viewers to an exotic location, create a fantasy world, or simply add branding elements to your video, chroma keying empowers you to bring your vision to life in a visually stunning way. In summary, chroma keying is a versatile technique that can elevate the production value of your videos and take your storytelling to the next level!
Masking.
Video editing involves a number of techniques that allow users to create high-quality, visually-engaging content. One such technique is the process of hiding or revealing certain parts of a clip using a specific shape or path, which is an important aspect of producing professional-grade videos.
By utilizing this technique, video editors can dynamically control which parts of a shot are visible, creating stunning visual effects and emphasizing the key points of a video. The process involves setting up a shape or path that defines which parts of the clip will be visible, and then adjusting the opacity or other effects of those parts to create the desired result.
Overall, this technique offers a powerful way for video editors to craft visually-compelling content that is sure to captivate their audience.
Transitions.
The effects that are utilized to transition seamlessly between one clip and the next are known as video transitions. These effects are crucial in video editing as they help in creating a smoother, polished flow in the content. With the use of professional video editing software, you have an array of video transitions to choose from, such as crossfades, dissolves, wipes, and fades, that can be customized to match the tone of your video content.
These effects can be adjusted in terms of speed, length, direction, and placement, to create a unique visual transition from one clip to the next. The right choice of video transition can elevate your video’s storytelling and help maintain viewer engagement throughout. Therefore, it is important to carefully select and place the appropriate video transition to enhance the quality of your video.
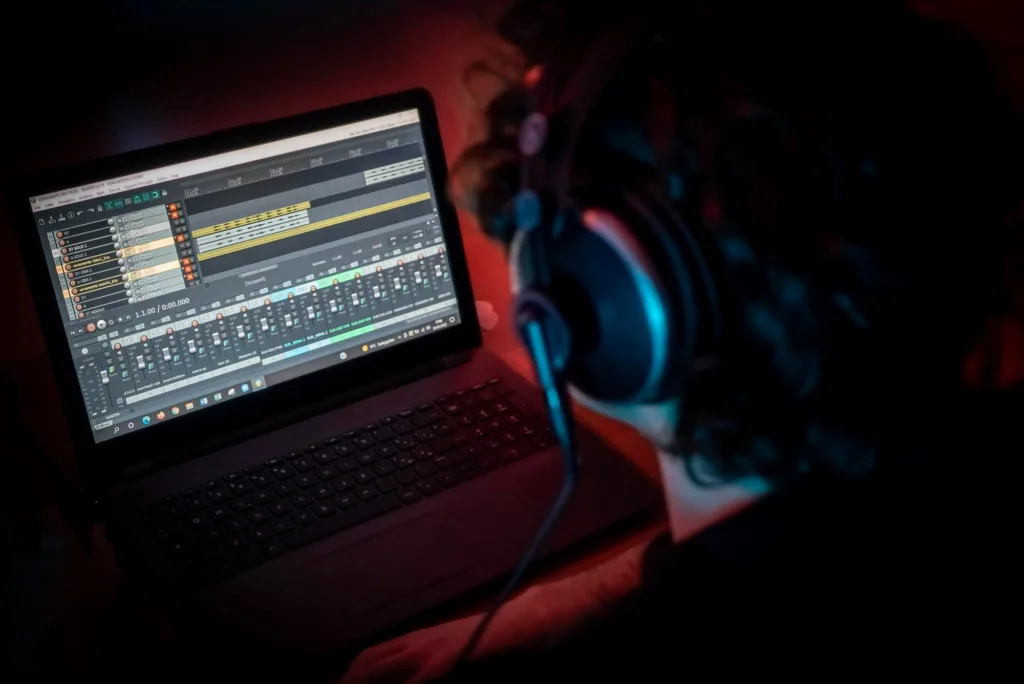
Audio Levels.
When it comes to audio clips, one important aspect to consider is the volume levels. Ensuring that your audio clips have appropriate volume levels can make a significant difference in the overall quality of your content. If the volume levels are too low, your audience may struggle to hear what is being said or miss important details.
Conversely, if the volume levels are too high, it can be uncomfortable for listeners and may distort the sound quality. Therefore, it is crucial to make sure that the volume levels of your audio clips are balanced and consistent throughout your content. This will not only improve the overall listening experience for your audience but also demonstrate your attention to detail and professionalism in your work.
B-Roll.
Additional footage is a valuable cinematographic tool utilized in film and video production. It helps to cut away from the main action or scene in order to add more context, create visual interest, or provide more information to the viewer. This technique is widely used in documentaries, news reports, music videos, and short films to keep the viewer engaged and informed.
By introducing new and different perspectives, additional footage can deepen our understanding of the main events or people in focus. It can show the surroundings, the context of the scene, or the emotions and reactions of other characters or objects within the scene. Additionally, it can offer a more diverse and dynamic visual experience that reinforces the main narrative or theme.
In short, additional footage is a powerful cinematic technique that can enhance a film’s storytelling, provide more context, and engage the viewer on multiple levels.
Compression.
One crucial aspect of optimizing your video files for various purposes is the process of compressing or reducing their size without compromising the quality too much. This process involves some technical knowledge and various tools to make it feasible. You need to choose the best software or app that suits your needs and specifications.
Some of these tools involve transforming your raw video files into more compressed formats like MP4, FLV, AVI, WMV, etc. Besides, you can lower the bitrate, resolution, or frames per second of your videos according to your desired size, quality, and platform. Additionally, you may apply some advanced video editing features like trimming, cropping, or merging specific video clips to reduce unnecessary elements that add up to your file size.
Overall, the goal of video compression is to keep your file size manageable while ensuring optimal video viewing experiences for your audiences.
Non-linear editing.
Non-linear video editing is an amazing technique that provides editors with the flexibility to reorder and edit video clips in a non-linear fashion, offering endless possibilities for creativity. Unlike linear editing, where the video footage has to be placed in a particular sequence to tell the story in a specific way, non-linear editing allows the video editor to shuffle the clips around and experiment with different variations until they achieve their desired outcome.
This technique is ideal for complex and intricate editing projects as it allows for more efficient management of large amounts of footage, saving time and speeding up the editing process. The editor has the option to work on different portions of the footage simultaneously, making it easier to refine and fine-tune the final cut. Non-linear video editing is a must-have skill for any professional video editor who wants to stand out in today’s dynamic video production landscape.
There you have it, folks! The top 15 video editing terms every YouTuber should know. With these terms under your belt, you’ll be able to navigate the world of video editing with ease and confidence. Happy editing!
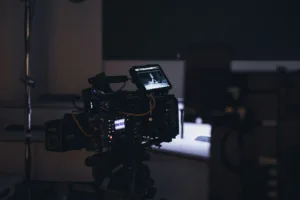
YouTube has evolved into a vast platform where creators can express their creativity, share knowledge, and entertain millions of viewers worldwide. If you’re considering embarking on a YouTube journey, having the right camera and equipment is essential for producing high-quality content that captivates your audience. So here is the best camera & equipment currently available.
In 2023, the market is filled with numerous options, making it challenging to determine the best camera and equipment for beginners. Fear not! In this comprehensive guide, we will explore the top choices for cameras, microphones, lighting, and other essential equipment that will help you kickstart your YouTube career.
Importance of High-Quality Video and Audio.
Before diving into the best camera and equipment options, it’s crucial to understand why high-quality video and audio are vital for YouTube success. With an abundance of content available, viewers have become more discerning about the quality of videos they consume.
Crisp visuals and clear audio can significantly impact the engagement and retention of your audience. Investing in the right equipment will help you stand out, establish credibility, and enhance the overall viewing experience.
Cameras for YouTube Beginners.
a. Smartphone Cameras.
Smartphones have come a long way in terms of camera capabilities. With advanced features like image stabilization, 4K video recording, and built-in editing tools, they are a convenient and budget-friendly option for beginners. Popular choices include the iPhone 13 Pro, Google Pixel 6, and Samsung Galaxy S21 Ultra.
B. DSLR and Mirrorless Cameras.
DSLR and mirrorless cameras offer superior image quality, interchangeable lenses, and manual controls, making them ideal for those seeking more professional-looking videos. The Canon EOS M50 Mark II, Sony Alpha a6400, and Nikon Z50 are excellent entry-level options that deliver stunning results.
C. Action Cameras.
Action cameras are compact, rugged, and perfect for vlogging on the go or capturing adventurous content. The GoPro Hero 10 Black, DJI Osmo Action, and Insta360 ONE R are reliable choices that offer impressive image stabilization, 4K video, and water resistance.
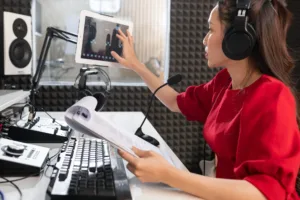
Microphones for Clear Audio.
a. USB Microphones.
USB microphones are plug-and-play devices that connect directly to your computer or smartphone. They provide excellent audio quality and are beginner-friendly. Popular USB microphones include the Blue Yeti, Audio-Technica ATR2100x-USB, and Rode NT-USB Mini.
b. Shotgun Microphones.
Shotgun microphones are highly directional, capturing audio from the direction they are pointed at, making them ideal for on-camera use. They help eliminate unwanted background noise and ensure clear and focused audio. Some popular shotgun microphone options include the Rode VideoMic Pro, Audio-Technica AT875R, and Sennheiser MKE 600.
c. Lavalier Microphones.
Lavalier microphones, also known as lapel microphones, are small and discreet, making them perfect for capturing hands-free audio. They are commonly clipped onto the clothing of the presenter or subject, delivering clear and consistent sound. Recommended lavalier microphones include the Rode SmartLav+, Audio-Technica ATR3350XIS, and Saramonic SR-WM4C.
Lighting Equipment for Well-Lit Videos.
a. Ring Lights.
Ring lights are circular light sources with a hole in the center for the camera to fit through. They provide even and diffused lighting, reducing shadows and enhancing facial details. The Neewer Ring Light Kit, Diva Ring Light Nova, and UBeesize Ring Light are popular choices for YouTube beginners.
b. Softbox Lights.
Softbox lights produce soft, diffused light, similar to natural light. They help minimize harsh shadows and create a professional look. Kits like the LimoStudio Softbox Lighting Kit, Fovitec Softbox Lighting Kit, and Godox SL-60W Softbox Kit are highly recommended for beginners.
c. LED Panel Lights.
LED panel lights offer adjustable brightness and color temperature, providing flexibility in different shooting environments. They are portable, energy-efficient, and can be mounted on tripods or used handheld. The Aputure AL-M9, Godox LEDP120C, and Falcon Eyes RX-12TD are excellent LED panel light options.
Tripods and Stabilizers for Steady Shots.
a. Tripods.
Tripods provide stability and help eliminate camera shake, resulting in smooth and steady shots. Look for lightweight and versatile options like the Manfrotto MT190XPRO4, Joby GorillaPod 5K, or ZOMEi Z669C to support various camera sizes and shooting styles.
b. Gorilla Pods.
Gorilla Pods are flexible tripods with bendable legs that can be wrapped around objects for unique shooting angles. They are compact and easy to carry, making them ideal for vlogging. The Joby GorillaPod 3K, UBeesize Tripod S, and JOBY GorillaPod Mobile Rig are popular choices.
Editing Software for Polishing Your Content.
a. Adobe Premiere Pro.
Adobe Premiere Pro is a professional-grade editing software widely used by YouTubers. It offers a vast array of features, including advanced editing tools, effects, and seamless integration with other Adobe Creative Cloud applications.
b. Final Cut Pro.
Final Cut Pro is a powerful editing software designed for Mac users. It provides a user-friendly interface, intuitive timeline, and a range of tools for precise editing and professional-grade results.
C. iMovie.
iMovie is a beginner-friendly editing software available for Mac and iOS devices. It offers a simplified interface, easy-to-use tools, and seamless integration with other Apple applications, making it an excellent choice for beginners.
Additional Accessories to Enhance Your Videos.
a. External Hard Drives.
External hard drives are essential for storing and backing up your video files. Opt for reliable brands like WD My Passport, Seagate Backup Plus, or Samsung T5 SSD to ensure ample storage space and data protection.
b. Memory Cards.
High-capacity and fast memory cards are crucial for capturing and storing your footage. Look for reputable brands such as SanDisk, Lexar, or Samsung, and consider cards with UHS-II or V30/U3 ratings for optimal performance.
c. Green Screens:
Green screens enable you to create a professional-looking background by replacing it with a digitally generated one during the editing process. The Elgato Green Screen, Neewer Green Screen Kit, and Fancierstudio Green Screen Kit are popular options for beginners.
Conclusion.
Investing in the right camera and equipment is vital for YouTube beginners who aspire to create engaging and high-quality content. Whether you choose a smartphone, DSLR, mirrorless camera, or action camera, consider your specific needs, budget, and desired level of professionalism. Pair your camera with a suitable microphone to ensure clear audio, and invest in lighting equipment for well-lit videos. Tripods, stabilizers, and editing software are essential tools for achieving steady shots and polishing your content during the post-production stage.
Don’t forget to explore additional accessories like external hard drives, memory cards, and green screens to enhance your video-making experience. With the right camera and equipment, coupled with your creativity and passion, you’ll be well on your way to establishing a successful YouTube presence in 2023 and beyond.
As a YouTuber, finding the right music for your videos can be a challenge. Copyright restrictions can limit your options, making it difficult to find the perfect soundtrack. However, there is a solution: Tunecutter! In this blog post, we’ll explore the best copyright-free music options available on Tunecutter to enhance your YouTube videos and keep your content legal.
Diverse & Exclusive Music Library.
Tunecutter boasts an extensive and diverse music library, featuring a wide range of genres and moods to suit any video theme or style. From upbeat electronic tracks to soothing acoustic melodies, you’ll find a treasure trove of options that will perfectly complement your content. All of these tracks are only available at Tunecutter.
High-Quality Compositions.
Every track on Tunecutter is carefully curated, ensuring top-notch compositions with impressive production value. Created by talented artists and composers, these tracks are designed to captivate your audience and enhance the overall impact of your videos.
Easy Licensing and Usage.
Navigating the world of copyright can be confusing, but Tunecutter simplifies the process. With clear licensing terms provided, you can easily understand the usage rights and restrictions associated with each track. Enjoy peace of mind as you incorporate copyright-free music into your videos without any legal worries.
User-Friendly Experience.
Tunecutter’s platform is designed with creators in mind. With its intuitive search functionality and easy-to-use interface, finding and downloading the perfect tracks for your videos is a seamless process. Spend less time searching and more time focusing on what you do best – creating captivating content.
Exceptional Value.
Worried about breaking the bank? Don’t be! Tunecutter offers unlimited downloads for an incredibly affordable price of just $29.99 per year. This means you can access a vast library of copyright-free music without any limitations, giving you the freedom to experiment and find the perfect soundtracks for all your videos.
Conclusion.
Unlock your creative potential with Tunecutter, your one-stop solution for the best copyright-free music for YouTube videos. With its extensive library, high-quality compositions, user-friendly experience, and unbeatable value, Tunecutter empowers YouTubers to enhance their content and captivate audiences with legal and exceptional music. Say goodbye to copyright headaches and hello to a world of creative possibilities. Join the Tunecutter community today and take your YouTube channel to new heights!
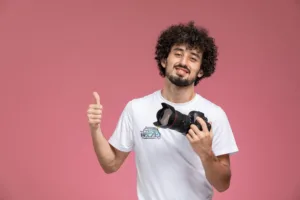
Welcome to our comprehensive review of the best cameras for YouTubers in 2023. If you’re an aspiring content creator or a seasoned YouTuber looking to up your game, finding the right camera is crucial to capturing high-quality videos that engage your audience. With an overwhelming number of options on the market, it can be challenging to navigate through the sea of choices. That’s where we come in.
In this guide, we have handpicked a selection of cameras that cater specifically to the needs of YouTubers. Whether you’re vlogging, creating tutorials, or filming cinematic masterpieces, we’ve got the perfect camera for you. We’ll dive deep into the features, performance, and suitability of each camera, helping you make an informed decision that aligns with your content style and budget.
The cameras we will be exploring include the Logitech c922, Logitech Brio, Insta360 Link, Sony ZV-1F, GoPro, Canon M50, Sony A7, and Panasonic GH5/GH6. Each of these cameras offers unique features and capabilities that can take your YouTube videos to the next level. From crisp image quality and smooth video stabilization to advanced autofocus and versatile shooting modes, we’ll break down what sets each camera apart and how it can enhance your content creation process.
Logitech c922.
The Logitech C922 is a game-changing webcam that brings your YouTube videos to life with its impressive features and performance. With its 1080p Full HD resolution, your viewers will enjoy crystal-clear video quality that enhances the visual experience. The advanced background removal feature allows you to seamlessly replace or blur your background, adding a professional touch to your videos. Thanks to the automatic low-light correction, the C922 adjusts to different lighting conditions, ensuring that you always look your best on screen.
One standout feature of the Logitech C922 is its built-in stereo microphone. The microphone captures your voice with remarkable clarity and precision, eliminating the need for an external microphone setup. This is especially convenient for content creators who value simplicity and want to focus on creating engaging videos without the hassle of additional equipment.
Additionally, the Logitech C922 offers versatile mounting options, making it compatible with various setups. Whether you’re using a tripod, mounting it on your monitor, or attaching it to a tripod stand, you can easily position the webcam to capture the perfect angle.
The C922 is not just about performance, but also convenience. It is compatible with popular streaming software and platforms, allowing you to easily integrate it into your workflow. The included software offers customizable settings, giving you control over your video output.
In conclusion, the Logitech C922 is an exceptional webcam for YouTube creators who want to take their videos to the next level. With its impressive video quality, advanced features, and user-friendly design, it’s a reliable companion that helps you deliver professional-looking content that engages and captivates your audience.
Logitech Brio.
The Logitech Brio stands as a notable webcam in today’s market, attracting attention with its stellar 4K ultra-high-definition video quality. This makes it a top choice for professionals and content creators who demand superior video performance for meetings, live streams, or recordings.
Beyond its 4K prowess, the Brio showcases an impressive degree of versatility. It features an adjustable field of view with settings for 65, 78, and 90 degrees, catering to a variety of user needs. Furthermore, it supports HDR, enhancing contrast and color fidelity to deliver more vibrant and realistic images.
Additionally, the Brio exhibits excellent performance in low-light conditions, thanks to RightLight 3 technology with HDR. It adjusts to your environment, ensuring you look your best regardless of lighting conditions.
The webcam’s build quality is robust and designed to endure regular use, and it’s simple to mount on multiple display types. Its plug-and-play compatibility with various operating systems adds to the overall user convenience.
However, the Brio is priced at the premium end of the market, which may deter some potential buyers.
In conclusion, the Logitech Brio presents a compelling option for users who prioritize video quality and versatile functionality, despite its premium price point.
Insta360 Link.
The Insta360 Link certainly makes a splash in the realm of innovative audio-visual technology. As a device that effectively transforms smartphones into 360-degree cameras, it is an exciting proposition for TuneCutter’s audience of music enthusiasts, content creators, and concert-goers.
Boasting high-resolution video capture, the Link provides stunning panoramic views that ensure every moment is captured with precision and clarity. Whether you’re recording a bustling concert scene or capturing intimate jam sessions, the device’s impressive fidelity will make you feel like you’re right in the middle of the action.
What sets the Link apart is its seamless integration with smartphones. It’s remarkably user-friendly, with a plug-and-play design that allows users to instantly transform their device into a 360-degree capture tool. This makes it an excellent choice for on-the-go creators who want to share immersive experiences without lugging around hefty equipment.
One caveat, however, is that the Link requires a fairly new smartphone to deliver its optimal performance. This might limit its appeal to some users.
Overall, the Insta360 Link stands out as a versatile, high-quality, and user-friendly tool that allows for a new dimension of content creation, making it a worthy addition to any music lover or content creator’s tech arsenal.
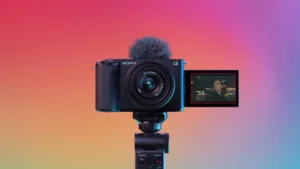
Sony ZV-1F.
The Sony ZV-1F is a sterling entry in the realm of vlogging cameras, packing robust features into a compact form factor, making it a perfect fit for TuneCutter’s content-creating audience.
Its standout feature is the superb 4K video quality with vibrant colors and high dynamic range. Coupled with a bright 24-70mm f/1.8-2.8 lens, the ZV-1F delivers stellar performance in a wide array of lighting conditions.
A major attraction is the fast and accurate autofocus system with Eye AF, ensuring your subject always stays in sharp focus. Plus, the innovative Product Showcase Setting is a boon for reviewers, allowing for quick focus shifts from face to product with ease.
Its compact, lightweight design enhances portability, while the vari-angle LCD screen and the included windscreen adapter make it great for vlogging on-the-go. The camera also supports livestreaming directly to popular platforms, a feature that contemporary creators will appreciate.
However, the battery life could be improved and the lack of an in-body image stabilization might concern some.
Despite minor gripes, the Sony ZV-1F is a compelling package. Its superior video quality, reliable autofocus, and vlogging-friendly features make it an excellent choice for creators looking to elevate their content game.
GoPro Hero 11.
As the latest installment in GoPro’s illustrious line, the Hero 11 brings several enhancements that make it a top-notch choice for TuneCutter’s music-loving, adventure-seeking audience.
The Hero 11 offers ultra-high-definition 5.3K video recording, a significant improvement from previous models, and 23MP photo capability. This results in stunning visual content, capturing every minute detail of your musical adventures and performances.
Its HyperSmooth 4.0 image stabilization outperforms its predecessor, delivering incredibly steady footage regardless of the filming conditions. Whether you’re crowd-surfing at a festival or rocking out on stage, you can rely on the Hero 11 for silky-smooth video.
The larger front-facing display is a welcome improvement for vloggers, making framing and composition simpler than ever. Enhanced low-light performance and an expanded 200ft waterproof capacity further add to its versatility.
The camera syncs seamlessly with the GoPro app for easy content sharing, though some users have noted that the battery life could be better.
All in all, the GoPro Hero 11 is an impressive action camera, offering superb video quality, enhanced stabilization, and user-friendly updates. It’s a worthy investment for anyone in our community, from music festival-goers to vloggers, who wants to capture their sonic experiences in stunning detail.
Canon M50.
The Canon M50 Mark II arrives as a refined upgrade to its predecessor, providing solid improvements that align well with the needs of TuneCutter’s content creators and music enthusiasts.
Its 24.1MP APS-C sensor delivers excellent image quality, while the improved Dual Pixel CMOS autofocus system, complete with eye-tracking, ensures sharp, precise focusing. Whether capturing intimate studio sessions or energetic live performances, you’ll find the M50 Mark II up to the task.
With 4K video recording capability, it offers high-quality video content creation. However, note that 4K recording comes with a significant crop factor, which might limit its usefulness for some.
One of the shining attributes of the M50 Mark II is its user-friendly design. The vari-angle touchscreen LCD offers flexible operation, and the menu system is intuitive and easy to navigate.
The camera also provides enhanced live-streaming capabilities, making it an ideal choice for those who want to share their musical experiences in real-time. Coupled with improved wireless connectivity for seamless file transfers, these features make content sharing a breeze.
Although it’s not a ground-breaking upgrade, the Canon M50 Mark II represents a reliable and user-friendly option for content creators who desire quality and convenience in a compact form.
Sony A7.
The Sony A7, with its full-frame 24.3MP sensor, is a game-changer for photographers and videographers in the TuneCutter community. It offers superb image quality, translating into richly detailed stills and full HD videos that capture every nuance of your musical moments.
The camera’s 5-axis in-body stabilization ensures clear, blur-free shots, even in low-light concert environments or when shooting handheld during energetic music videos. Its hybrid autofocus system, combining phase detection and contrast detection, delivers rapid and accurate focusing that won’t miss a beat.
The Sony A7 impresses with its compact, yet sturdy build quality. Its ergonomics are well thought-out, with a good balance of manual controls and customization options, though newcomers may face a slight learning curve with Sony’s menu system.
A notable drawback is the lack of 4K video capability. While its full HD video is still high-quality, creators seeking ultra-high definition footage might feel constrained.
Despite this, the A7’s strengths—high-resolution full-frame sensor, effective stabilization, and swift autofocus—make it a potent tool for music photographers and videographers. While it’s not the newest model in Sony’s lineup, it still holds its own as a reliable and high-performing camera.
Panasonic GH5/GH6.
The Panasonic GH5/GH6, with their exceptional video capabilities, have carved a niche in the realm of video-oriented mirrorless cameras, making them ideal for TuneCutter’s music-loving videographers.
Both cameras are lauded for their ability to record 4K at high frame rates, ensuring ultra-smooth and detailed video footage, whether it’s capturing the raw energy of a live concert or the subtleties of a studio session.
The GH5’s 20.3MP Micro Four Thirds sensor and the GH6’s upgraded sensor deliver excellent image quality, with the GH6 offering better low-light performance and dynamic range, crucial for those tricky lighting situations on stage or at gigs.
Both models feature 5-axis in-body stabilization, producing steady footage even in handheld shooting scenarios, and their robust, weather-sealed bodies withstand demanding shooting conditions.
The cameras also come with a fully articulating screen, essential for vloggers and self-filming musicians. While the GH5/GH6 offer a plethora of video-centric features, they do present a learning curve with their extensive menus and controls.
Despite this, the Panasonic GH5 and GH6 stand as powerful tools for content creators, offering top-tier video performance and flexibility. While the GH6 provides a step up in sensor performance, both cameras are worthy investments for any TuneCutter audience member.
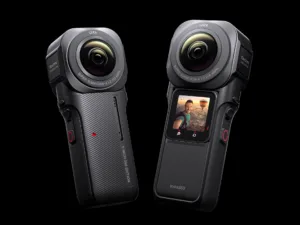
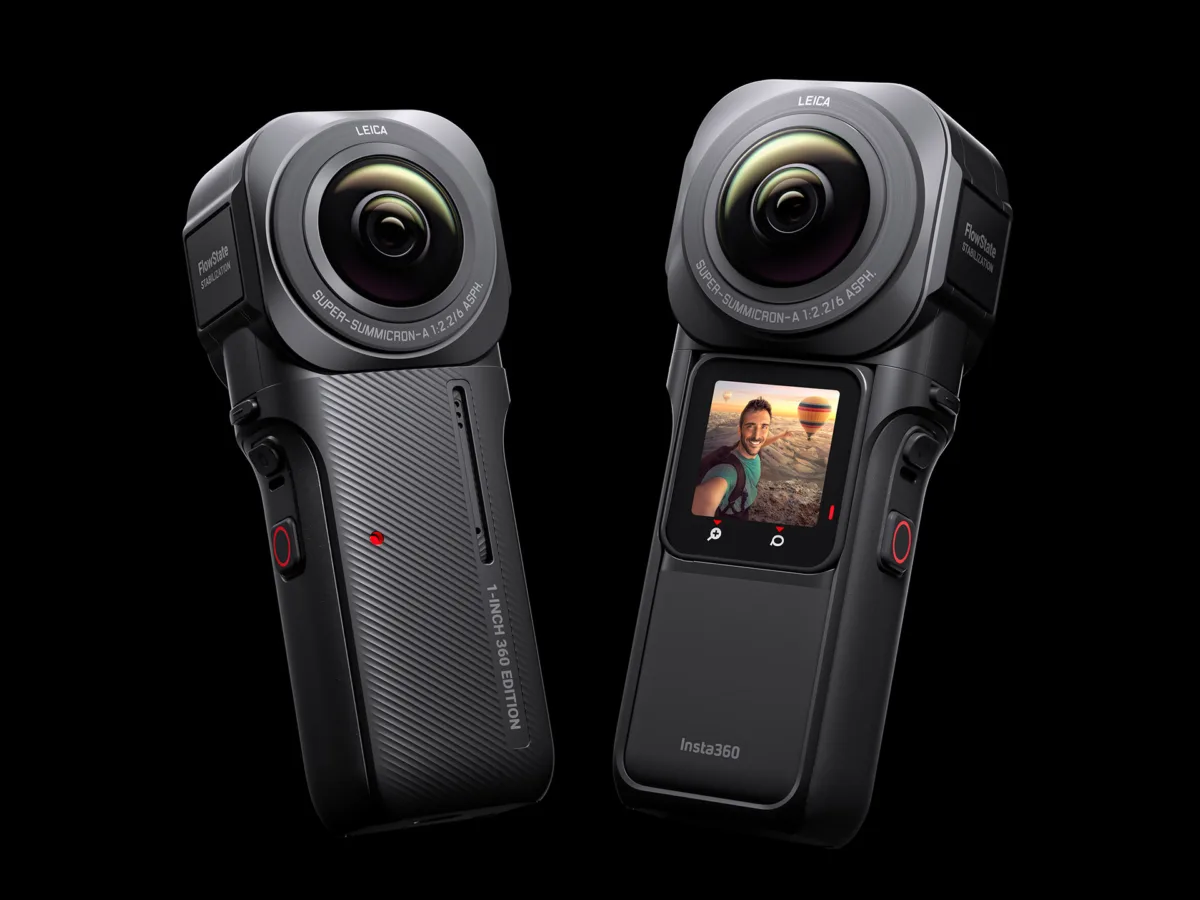
In the fast-paced world of content creation, where capturing mind-blowing moments is the name of the game, the Insta360 One R steps onto the stage with its unique blend of versatility, exceptional image quality, and a touch of whimsical charm.
Buckle up as we embark on a wild ride exploring the extraordinary features of this camera that will take your content to the next level.
Modular Design: Transformative Camera Magic.
Imagine being the master of your camera universe. With the Insta360 One R’s modular design, you hold the power to switch between lenses like a content creation sorcerer. From wide-angle wizardry to 360-degree enchantment, this camera unleashes your creative prowess like no other.
Exceptional Image Quality: Capture Moments with Wizard-like Precision.
Prepare to have your visual senses tingling with delight. The Insta360 One R boasts high-resolution sensors and spellbinding image processing, delivering photos and videos that transport your audience into the heart of the action. Say goodbye to mundane visuals and hello to eye-popping wizardry!
Advanced Stabilization: The Secret to Seamless Sorcery.
No more shaky footage casting a shadow on your brilliance! The Insta360 One R’s advanced stabilization technology keeps your shots as smooth as a wand gracefully waving through the air. Whether you’re chasing mythical creatures or spinning magical tales, your videos will be as steady as a seasoned wizard’s hand.
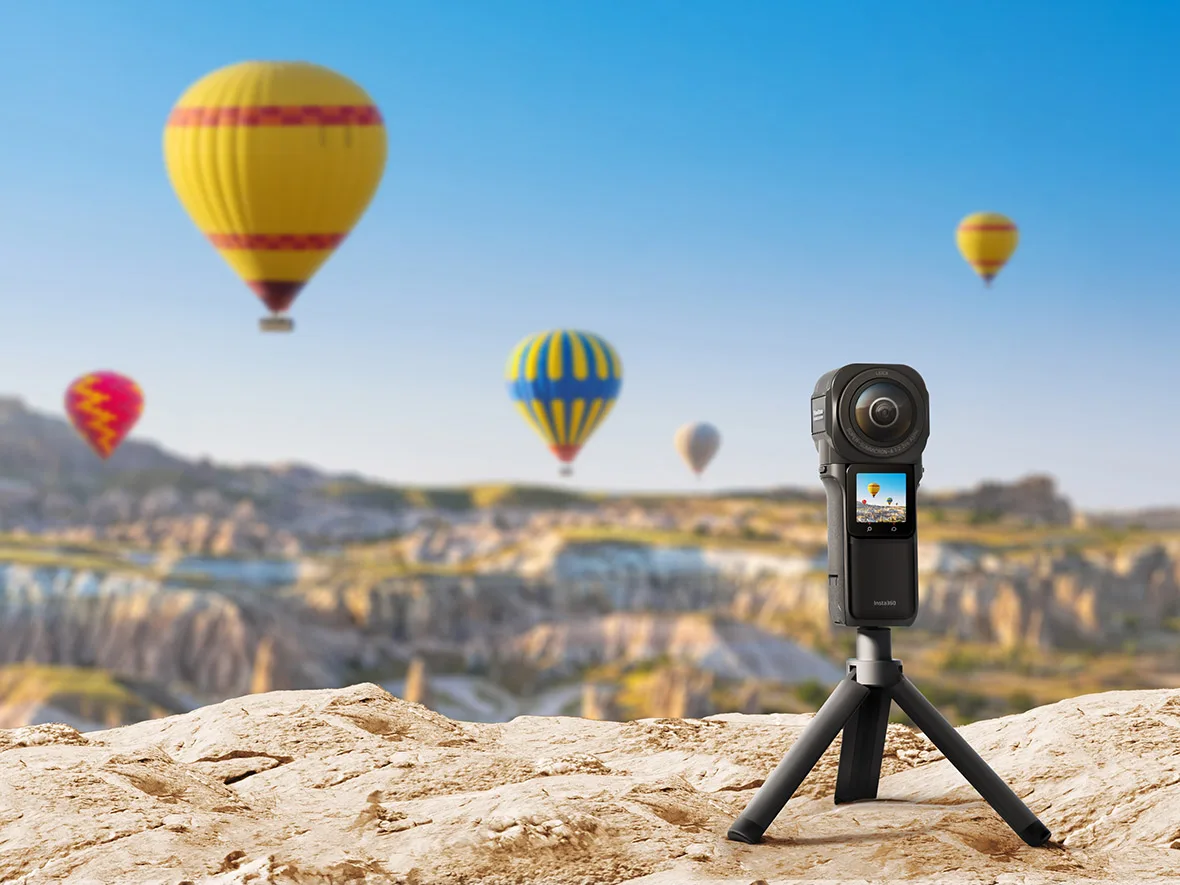
Immersive 360-Degree Capabilities: A Journey into the Realm of Wonder.
Prepare to immerse your audience in a vortex of awe-inspiring content. With the Insta360 One R’s 360-degree capabilities, you become the conjurer of immersive storytelling. Capture the enchantment of every angle, casting a spell of wonder upon your viewers that will leave them mesmerized and craving more.
Intuitive Control and Editing: The Sorcerer's Apprentice.
Cast a spell of convenience with the Insta360 app, your trusted sidekick in content creation. This intuitive companion allows you to control your camera, preview footage in real-time, and edit your bewitching content effortlessly. Transform your creations with a flick of your wand, adding music, applying magical filters, and even crafting spellbinding hyperlapse videos.
Durability and Versatility: Adventure Awaits, Wizard-style.
Step into the shoes of a fearless adventurer. The Insta360 One R is crafted with the resilience and versatility of a wizard’s spellbook. From capturing mystical moments in extreme weather conditions to diving into the depths of the ocean like a true water wizard, this camera is your trusted companion on every enchanting quest.
Conclusion of the Insta360 one R camera.
Prepare to unleash your creative wizardry with the Insta360 One R. This camera is not just a tool; it’s a gateway to a realm of unparalleled content creation. With its modular design, exceptional image quality, and a touch of quirky charm, the Insta360 One R invites you to dance to the beat of your own magical drum. Elevate your content game, bewitch your audience, and embrace a world where creativity knows no bounds. The Insta360 One R: Your ticket to a spellbinding content creation adventure!
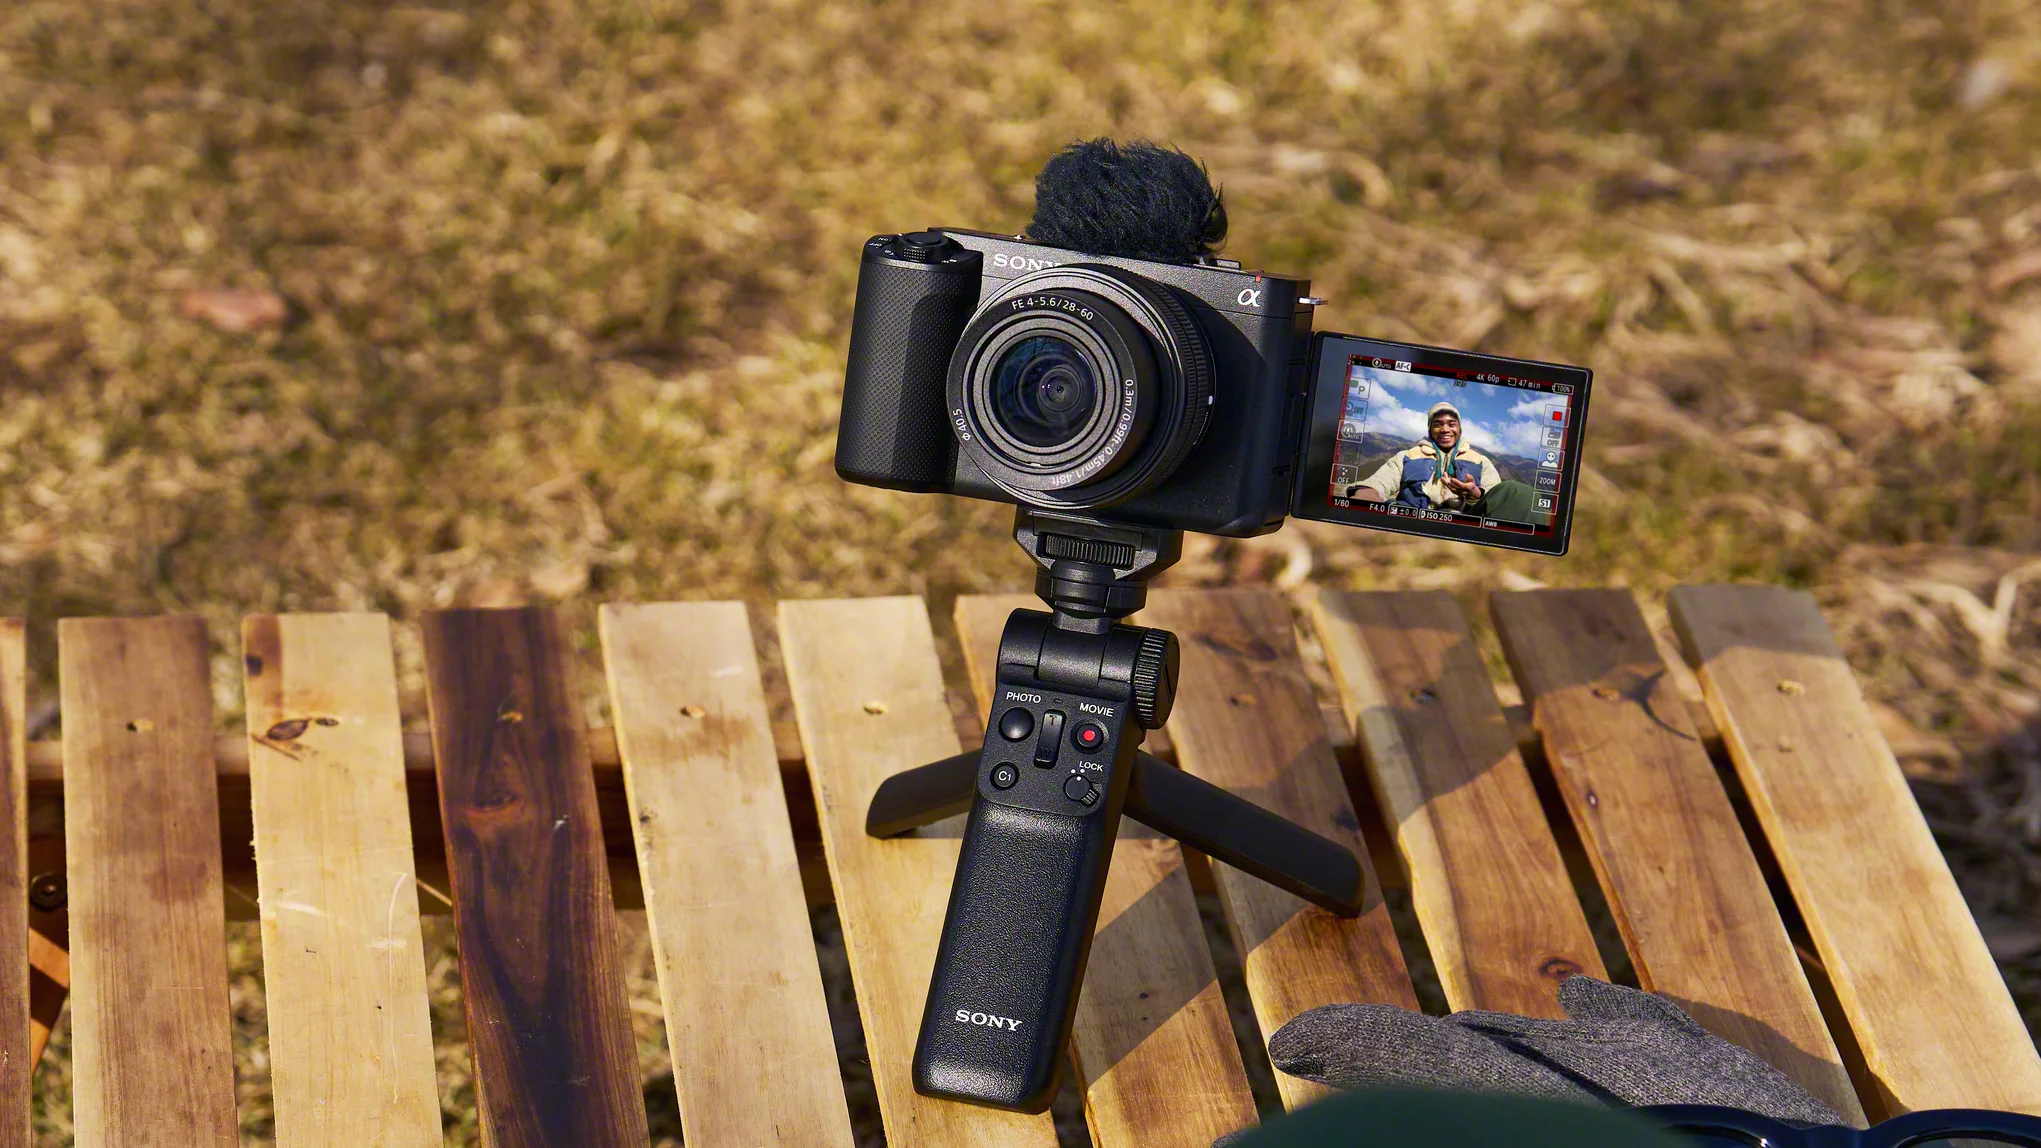
The Sony ZV-E1 camera is a powerful tool designed specifically for content creators, offering an array of features tailored to capture stunning visuals and exceptional audio. In this in-depth review, we will explore the key aspects of the Sony ZV-E1, highlighting its performance, versatility, and suitability for the needs of musicians and creators in the Tunecutter community.
Design and Ergonomics.
The Sony ZV-E1 features a compact and lightweight design, making it highly portable and convenient for on-the-go shooting. Its user-friendly interface and intuitive controls ensure effortless operation, allowing creators to focus on their craft without being hindered by complex settings.
Image Quality and Video Capabilities.
Equipped with a 24.2-megapixel APS-C Exmor CMOS sensor and the powerful BIONZ X image processor, the Sony ZV-E1 delivers exceptional image quality with sharp details, vibrant colors, and impressive low-light performance. Its ability to shoot 4K video at various frame rates offers creators the flexibility to capture their content in stunning high resolution.
Audio Performance.
One standout feature of the Sony ZV-E1 is its emphasis on high-quality audio. With a built-in directional 3-capsule microphone and a 3.5mm microphone jack, creators can achieve professional-grade sound to complement their visuals. The camera also includes features like wind noise reduction and audio level adjustment, ensuring clear and immersive audio recordings.
Vlogging and Content Creation Features.
Designed with vloggers and content creators in mind, the Sony ZV-E1 offers a range of features to enhance the creation process. The vari-angle LCD screen allows for flexible framing and effortless selfie shooting, while the Soft Skin Effect and Background Defocus features add a professional touch to videos. Additionally, the camera offers in-camera stabilization, time-lapse recording, and a selection of creative picture profiles to unleash your artistic vision.
Connectivity and Workflow.
The Sony ZV-E1 provides seamless connectivity options to streamline your workflow. With built-in Wi-Fi and Bluetooth, creators can easily transfer files to their devices, remotely control the camera, and even livestream their content directly to platforms like YouTube or Instagram. The camera is also compatible with a wide range of accessories, including external microphones, tripods, and lighting equipment, further expanding creative possibilities.
Conclusion of the Sony ZV-E1 camera.
The Sony ZV-E1 camera is a powerful and versatile tool that empowers musicians and creators in the Tunecutter community to capture their artistic vision with exceptional image quality and immersive audio. With its compact design, intuitive controls, and a host of vlogging-friendly features, it is an ideal companion for those seeking to elevate their content creation. Unleash your creativity with the Sony ZV-E1 and bring your musical and visual creations to life like never before.
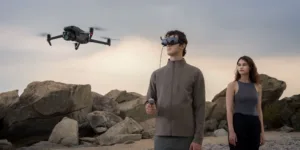
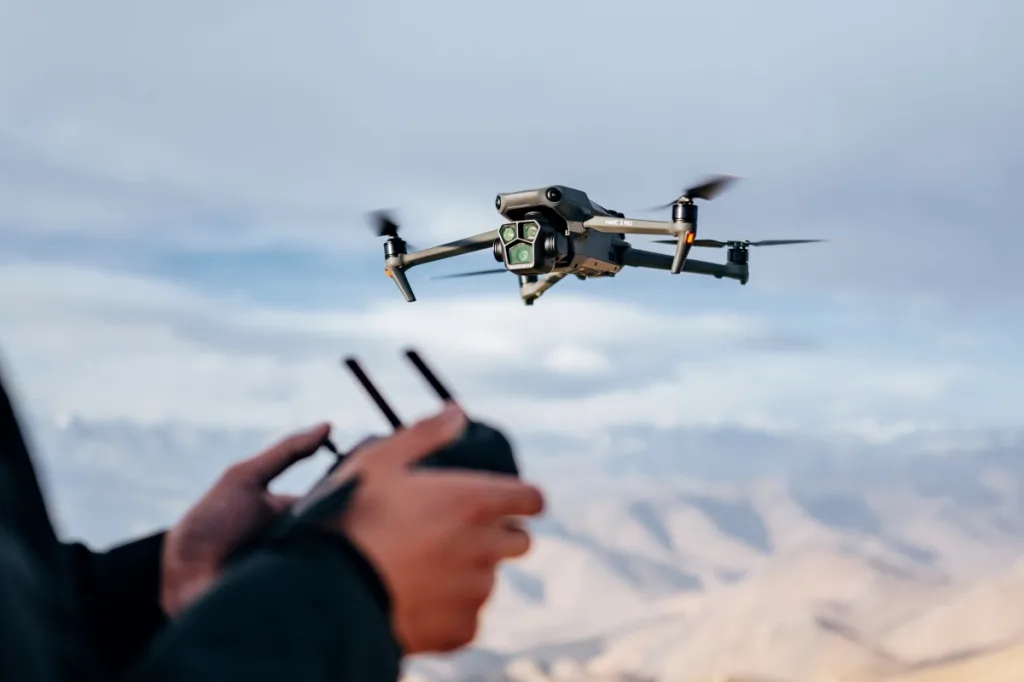
The DJI Mavic 3 Pro has made its much-anticipated debut in the world of drones, and it’s safe to say that it has taken aerial cinematography to new heights. Packed with advanced features, stunning image quality, and unmatched performance, this drone has captured the attention of both professional filmmakers and hobbyists alike.
In this comprehensive review, we will delve into the key features, performance capabilities, and overall user experience of the DJI Mavic 3 Pro, providing you with all the insights you need to make an informed decision.
Unparalleled Image Quality.
One of the standout features of the DJI Mavic 3 Pro is its exceptional image quality. Equipped with a powerful 20-megapixel Hasselblad camera and a large 1-inch CMOS sensor, this drone captures breathtaking stills and videos with astonishing clarity, sharpness, and dynamic range. Whether you’re capturing sweeping landscapes or close-up details, the Mavic 3 Pro delivers professional-grade imagery that rivals even high-end cameras.
Intelligent Flight Modes.
The Mavic 3 Pro takes aerial photography to the next level with its intelligent flight modes. From ActiveTrack 4.0 that allows the drone to autonomously follow subjects to Spotlight 2.0 that keeps the camera locked on a subject while the drone flies freely, these modes offer unparalleled flexibility and creative possibilities. Whether you’re capturing action sports, wildlife, or dynamic scenes, the Mavic 3 Pro’s intelligent flight modes simplify the process and help you achieve stunning shots with ease.
Enhanced Flight Performance.
With its upgraded propulsion system and advanced flight controller, the DJI Mavic 3 Pro delivers enhanced flight performance that is both precise and stable. It boasts a maximum flight time of up to 46 minutes, allowing for longer and more immersive aerial sessions. The drone’s improved obstacle sensing and avoidance systems ensure a safer flying experience, giving you peace of mind while navigating through challenging environments.
Intuitive Controls and Smart Features.
DJI has always been known for its user-friendly interfaces, and the Mavic 3 Pro is no exception. The drone can be controlled via the included remote controller, or through the DJI Fly app on your smartphone or tablet. The app provides a seamless and intuitive interface, allowing you to access and control the drone’s features with ease. Additionally, the Mavic 3 Pro comes equipped with smart features such as automatic takeoff and landing, return-to-home, and precision hovering, making it accessible to both beginners and experienced pilots.
Advanced Safety and Security:
When it comes to flying a drone, safety is of utmost importance. The DJI Mavic 3 Pro incorporates advanced safety features to ensure a secure and worry-free flight. It is equipped with an AirSense system that detects nearby aircraft and alerts the pilot, helping to prevent potential collisions. Additionally, the drone features an advanced geofencing system that helps you fly within legal boundaries and avoid restricted airspace, ensuring compliance with local regulations.
Conclusion of the DJI Mavic 3 Pro.
In conclusion, the DJI Mavic 3 Pro is a game-changer in the world of aerial cinematography. Its exceptional image quality, intelligent flight modes, enhanced flight performance, and user-friendly controls make it a top choice for professionals and enthusiasts alike. Whether you’re a filmmaker, a content creator, or simply someone who enjoys capturing stunning aerial imagery, the Mavic 3 Pro offers a truly immersive and exhilarating experience. With its advanced features and unmatched performance, this drone takes aerial cinematography to new heights.
If you’re ready to elevate your aerial photography and videography to the next level, the DJI Mavic 3 Pro is an investment worth considering. It offers the perfect balance
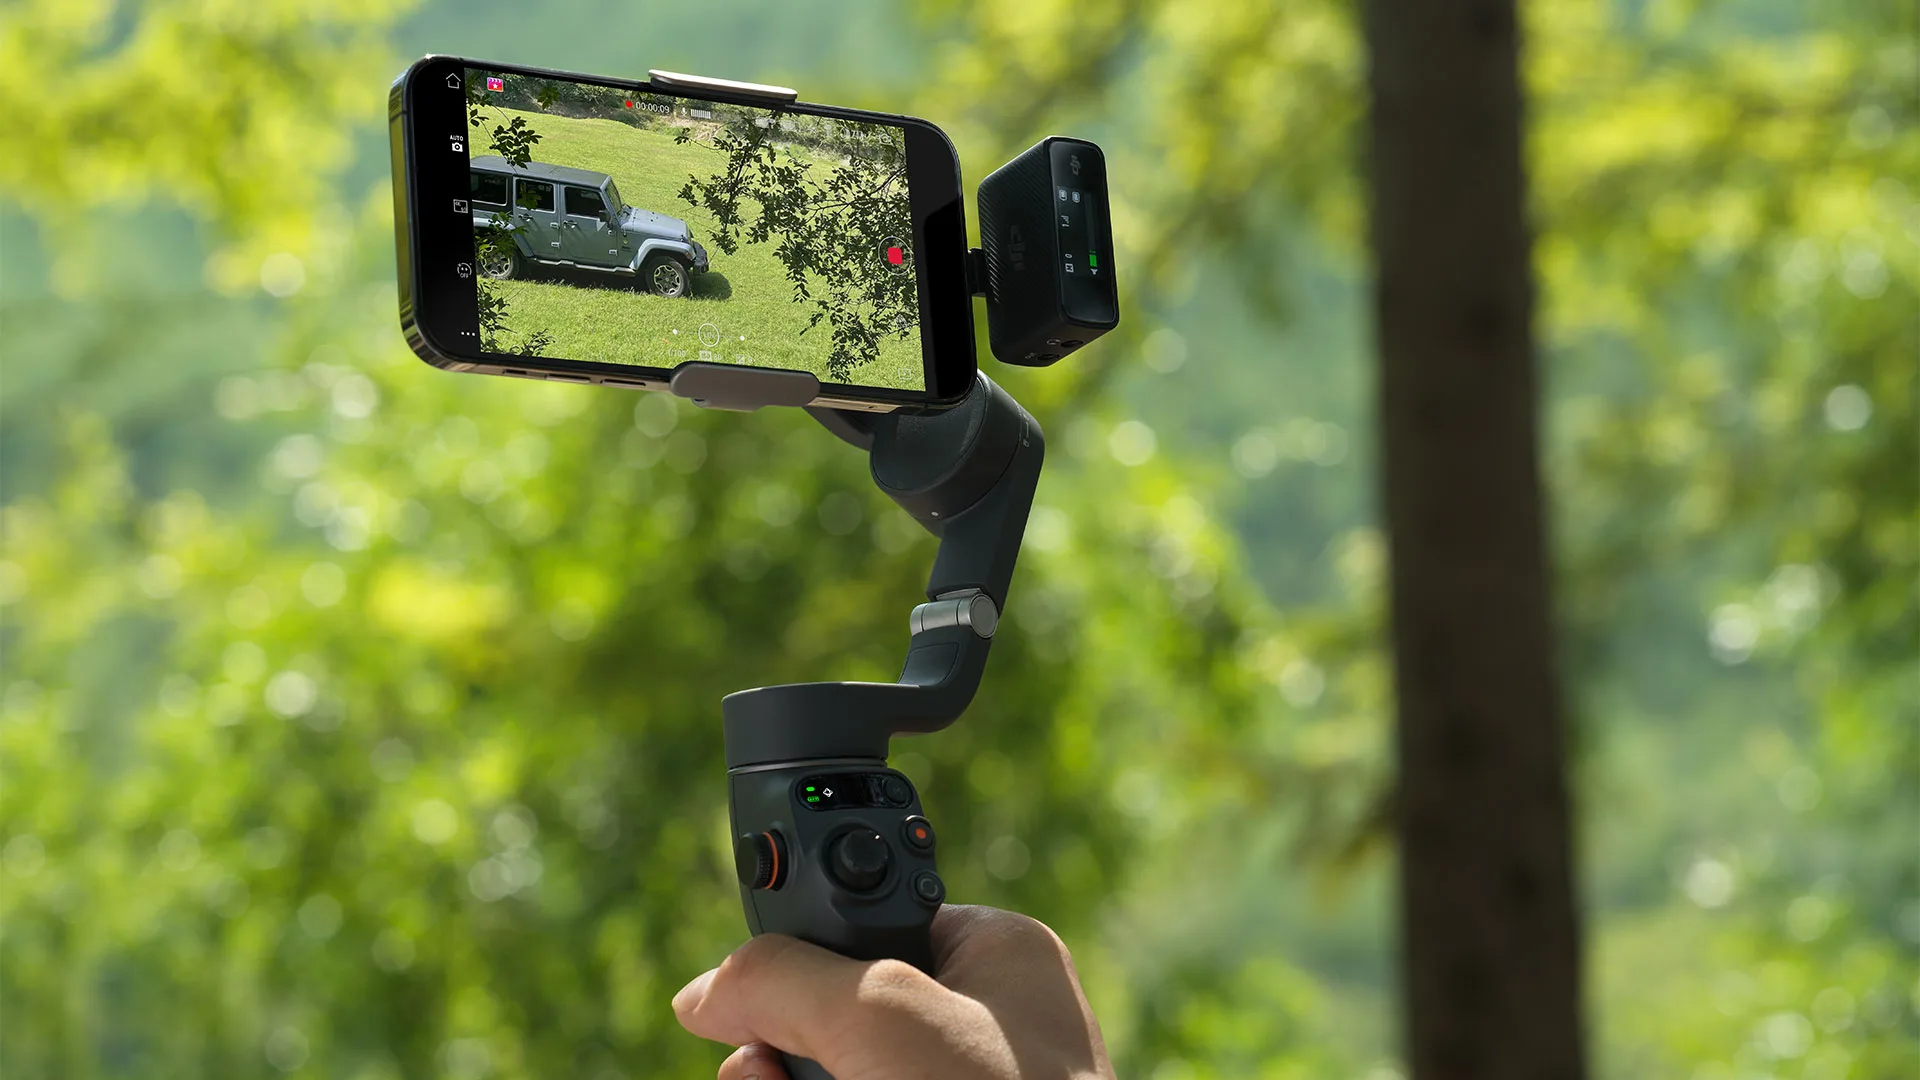
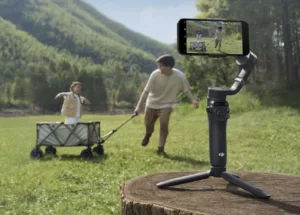
The DJI Osmo Mobile 6 is a revolutionary smartphone gimbal that takes mobile videography to the next level. With its advanced stabilization technology, intuitive controls, and impressive features, it offers a seamless and immersive shooting experience. In this comprehensive review, we’ll dive into the key aspects of the DJI Osmo Mobile 6, exploring its design, performance, features, and real-world applications.
Design and Build Quality.
The DJI Osmo Mobile 6 features a sleek and ergonomic design that ensures a comfortable grip during prolonged shooting sessions. The gimbal is constructed with high-quality materials, ensuring durability and longevity. Its foldable design makes it highly portable and easy to carry in a backpack or pocket, allowing you to capture smooth footage wherever you go.
Stabilization Performance.
At the heart of the DJI Osmo Mobile 6 is its advanced stabilization technology, which eliminates unwanted shakes and vibrations, resulting in silky-smooth footage. Whether you’re walking, running, or even capturing fast-paced action sequences, the Osmo Mobile 6 ensures that your videos remain stable and professional-looking. The gimbal’s motors and intelligent algorithms work in harmony to provide exceptional stabilization, allowing you to focus on your creativity without worrying about shaky footage.
Intuitive Controls.
The Osmo Mobile 6 offers a user-friendly interface, making it easy for both beginners and experienced videographers to operate. The joystick allows for precise control over the gimbal’s movement, enabling you to pan, tilt, and roll smoothly. Additionally, the integrated buttons on the handle provide quick access to various features and shooting modes. The DJI Mobile app further enhances the user experience, providing advanced settings, intelligent shooting modes, and creative tools.
Impressive Features.
The DJI Osmo Mobile 6 comes packed with a range of impressive features that enhance your mobile videography experience. The ActiveTrack feature allows you to easily track subjects, keeping them in the frame as you move. Timelapse and Motionlapse modes enable you to create captivating time-lapse sequences with smooth camera movements. Other features include Panorama mode, Slow Motion mode, and Gesture Control, offering creative possibilities to capture unique and engaging footage.
Battery Life and Charging.
The Osmo Mobile 6 offers an extended battery life, allowing for long shooting sessions without interruption. It features a built-in rechargeable battery that can last for several hours, depending on usage. Additionally, the gimbal’s USB port enables you to charge your smartphone on the go, ensuring that your device remains powered up for extended shooting periods.
Real-World Applications.
The DJI Osmo Mobile 6 is versatile and suitable for various applications. Whether you’re a travel vlogger capturing stunning landscapes, a content creator producing engaging videos, or even a filmmaker working on professional projects, the Osmo Mobile 6 adapts to your needs. Its ability to stabilize footage and provide smooth camera movements elevates the quality of your videos, creating a professional look that impresses viewers.
User Reviews And Feedback.
The DJI Osmo Mobile 6 has garnered positive reviews from users and industry experts alike. Many reviewers praise its exceptional stabilization performance, ease of use, and the wide range of features it offers. The gimbal’s compatibility with different smartphone models, including both iOS and Android devices, has also been appreciated.
Conclusion for DJI Osmo Mobile 6.
The DJI Osmo Mobile 6 is a game-changer in the world of mobile videography, providing exceptional stabilization, intuitive controls, and a range of impressive features. Its sleek design, extended battery life, and compatibility with various smartphones make it a versatile tool for creators of all levels. The positive user reviews and expert opinions further validate its performance and reliability.
Whether you’re a travel vlogger, content creator, or filmmaker, the DJI Osmo Mobile 6 is a worthy investment that elevates your mobile videography game to new heights.
So, grab your smartphone, unleash your creativity, and capture smooth and professional-looking footage with the DJI Osmo Mobile 6.