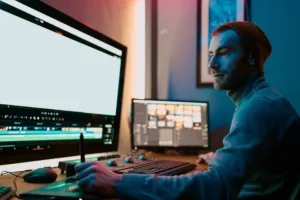
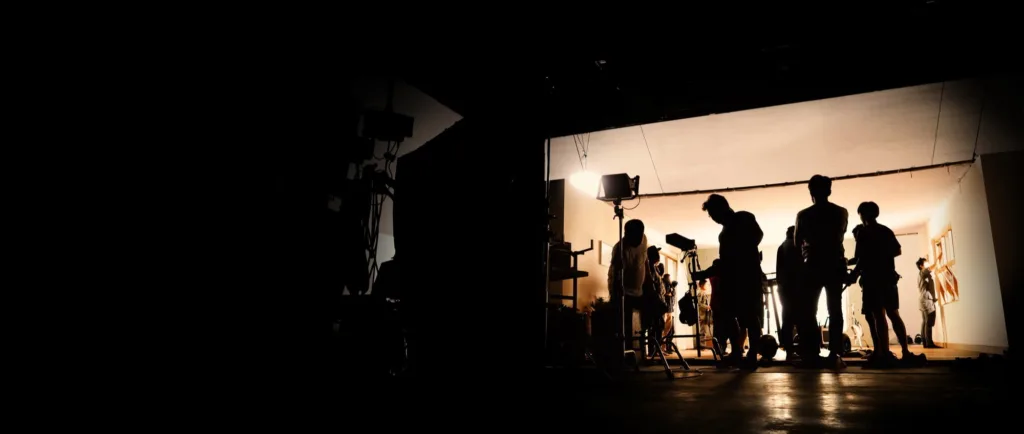
Welcome to the exciting world of video production, where everything is possible, and nothing is out of reach! If you’re looking to take your video content to the next level, you’re in the right place. Today, we’re going to talk about one of the most important concepts in video production: production value.
In a nutshell, production value is the overall quality of your video content. It’s the combination of all the elements that go into making a video, including the lighting, sound, camera work, editing, and more. When all of these elements come together seamlessly, you have a high production value video that engages your audience and leaves a lasting impression.
how do you use production value to your advantage?
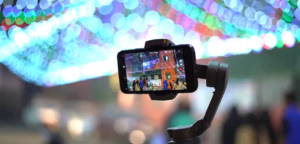
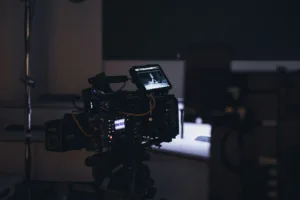
First and foremost, it’s essential to invest in the right equipment. A high-quality camera, lighting equipment, and microphones can make all the difference in the world. These items may seem like a significant investment upfront, but the payoff in the quality of your content is worth it.
Next, it’s essential to pay attention to the details. Simple things like framing your shots correctly, using appropriate lighting, and capturing high-quality sound can make a massive difference in your final product. Take the time to plan your shots, think about your lighting, and capture great sound. It will pay off in the end.
Another crucial aspect of production value is post-production. Editing can take your footage to the next level, adding music, sound effects, and other elements that help tell your story. Take the time to learn about editing software and techniques that can help you create a polished final product.
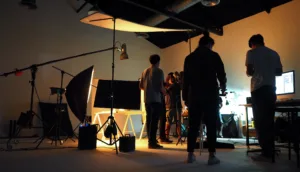
When it comes to creating the perfect lighting setup, there are a lot of different factors to consider. One key element to keep in mind is the importance of fill lighting. This type of lighting serves a very specific purpose – it is placed on the opposite side of the key light and used to fill in any shadows that are created by that light source.
The goal is to create a more balanced and flattering look, by ensuring that your subject is effectively illuminated from all angles. To achieve this, fill lighting is usually set at a lower intensity than the key light – this helps to prevent any harsh or overwhelming effects that could potentially detract from the overall aesthetic of the shot.
Whether you’re shooting stills or video, mastering the art of fill lighting can make a big difference in the final outcome of your visual content.
Conclusion.
In summary, production value is all about creating high-quality video content that engages your audience and leaves a lasting impression. By investing in the right equipment, paying attention to the details, and taking the time to edit your footage, you can create a video that stands out and makes an impact. So go out there and create something amazing!
Hey there! Are you ready to learn about 3-point lighting in filmmaking? Let’s dive into it!
Have you ever watched a movie or a video and wondered why the actors look so good on camera? One of the reasons is likely due to proper lighting, specifically the use of 3-point lighting.
So, what is 3-point lighting? It is a lighting technique that uses three different lights positioned in a specific way to create a balanced and dynamic look for your subject. The three lights are:
Key light.
The key light is an essential element in lighting for photography, film, and other visual arts. It serves as the primary illumination for the subject of the scene, and it is usually placed at an angle of 45-degrees from the camera’s viewpoint.
This way, it creates shadows and highlights that contribute to the overall tone and mood of the picture. The position of the key light can change depending on the desired effect and the number of subjects in the scene. Its brightness can also vary based on the conditions of the environment and the desired style of the shoot.
In short, the key light is a critical tool for any photographer or filmmaker to master in order to achieve stunning visual results.
Fill light.
When it comes to creating the perfect lighting setup, there are a lot of different factors to consider. One key element to keep in mind is the importance of fill lighting. This type of lighting serves a very specific purpose – it is placed on the opposite side of the key light and used to fill in any shadows that are created by that light source.
The goal is to create a more balanced and flattering look, by ensuring that your subject is effectively illuminated from all angles. To achieve this, fill lighting is usually set at a lower intensity than the key light – this helps to prevent any harsh or overwhelming effects that could potentially detract from the overall aesthetic of the shot.
Whether you’re shooting stills or video, mastering the art of fill lighting can make a big difference in the final outcome of your visual content.
Backlight.
The use of backlighting is an effective technique in photography that is aimed at creating a clear separation between the subject and the background. It involves placing the light source behind the subject, which helps to enhance the quality of the shot. Apart from the separation, backlighting is also useful in adding depth to the shot, which contributes to creating a more three-dimensional aspect to the subject.
Furthermore, the use of backlighting can produce a natural-looking highlight around the edges of the subject, which gives it a more polished and refined appearance. By employing this technique in your photography, you can add an extra dimension of interest and appeal to your shots, allowing them to stand out from the rest and capture the attention of your viewers.
By using 3-point lighting, you can create a polished and professional look to your video. It can be used in a variety of settings, from interviews to product shots to narrative filmmaking.
So, how do you use 3-point lighting in your own videos? Here are some quick tips:
Set up your key light first, making sure it is positioned at a 45-degree angle to the subject.
Add your fill light to the opposite side of the key light and adjust the intensity as needed.
Place your backlight behind the subject and adjust the intensity as needed.
Play around with the positioning and intensity of each light until you achieve the desired look.
Conclusion.
Creating visually appealing videos is important for capturing your audience’s attention and keeping them engaged. A great way to achieve this is by using 3-point lighting, a technique commonly used in film and television production. By incorporating this technique into your own videos, you can improve the overall quality of your visual content.
To get started, try using a key light to highlight your subject, a fill light to provide balanced lighting, and a backlight to add depth to your shot. With a little bit of practice, you’ll be able to master this technique and improve the overall look and feel of your videos.
So why not give it a try today and see the difference it can make in your content creation? We wish you the best of luck and happy filming!
Greetings and salutations, my esteemed and beloved YouTube colleagues! I hope that this message finds you well and that you are not feeling overwhelmed or disheartened by the plethora of esoteric and highfalutin video editing terms that seem to saturate the digital landscape. Fear not, my dear friends; for I have come to offer my warm and reassuring presence as your dedicated and reliable mentor and guide, as you navigate the treacherous and complex terrain of the video editing world. The Top 15 Video Editing Terms every YouTuber needs to know.
For on this auspicious occasion, I shall impart unto thee, the invaluable knowledge and wisdom, of the top 15 must-know video editing terms that every budding YouTuber simply must familiarize themselves with, if they aspire to reign supreme in the exciting and competitive world of online video content creation. So, let us proceed forthwith, with unbridled ardor, and embark on a thrilling and engaging journey together, as we explore and unravel the mysteries of the art of video editing!
cut.
Video editing can seem daunting for beginners, but fear not! One of the most fundamental concepts in video editing is the cut. This involves removing a section of a clip, and can be used to remove unwanted footage, switch between different shots, or shorten a scene for better pacing. As you become more familiar with video editing, you’ll discover the many different types of cuts, such as jump cuts, match cuts, and J-cuts, which can all be used to achieve different effects and styles.
Whether you’re just starting out or have some experience under your belt, mastering the cut is an essential skill in creating polished and professional-looking videos. So why not give it a try and experiment with editing your own clips? You never know what kind of creative possibilities may arise.
Clip.
When producing a video, a crucial component is the utilization of a single video or audio file that is specifically selected to enhance the quality and impact of the project. Such a selection involves a rigorous process that ensures the chosen file matches the theme, message, and tone of the entire production. This single file extraction enables the author to minimize the time spent on searching for other unnecessary materials, thus ensuring that the finished product consists only of high-quality content that resonates with the viewers.
The singular selection of a video or audio file can have a significant impact on the delivery of your video project by increasing its effectiveness in achieving its intended purpose. Whether it’s a short-form video with a call to action or an in-depth documentary, this singular file can lead to a higher engagement rate and a more significant overall impact on your audience.
Timeline.
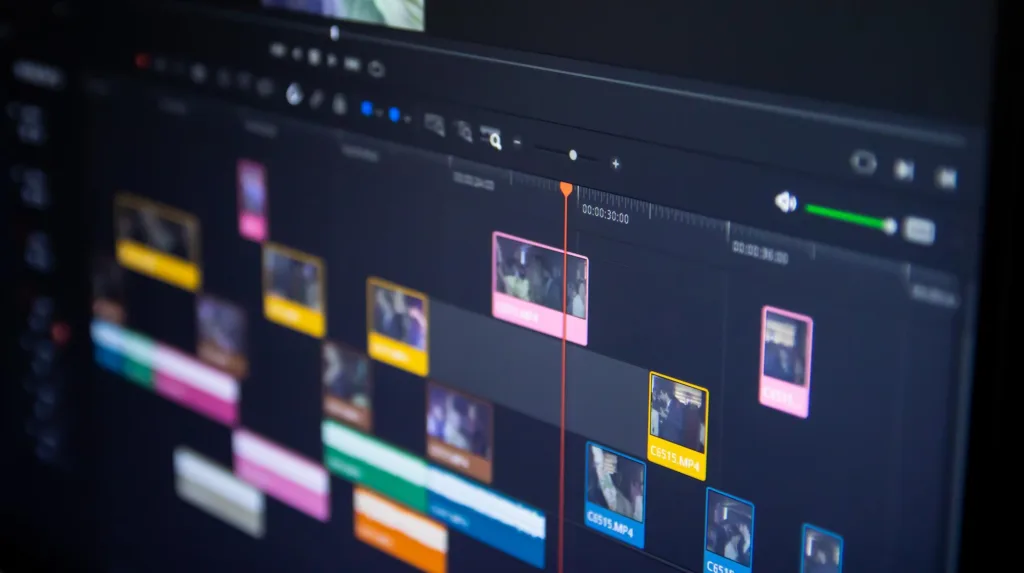
The section of your video editing software, known as the timeline, serves as a pivotal component that allows you to arrange and modify your video clips, images, audio tracks or any other media you may be utilizing in a sequential and cohesive manner. Essentially, it functions as an organized canvas, enabling you to cut, trim, add effects, transitions as well as audio – placings each piece in its desired position, essentially managing the flow, rhythm, and tempo of your video project.
By arranging your visual and audio content in a timeline, you can obtain the optimum structure and transition between your clips, ensuring a smooth and polished end result that your audience will watch with enthusiasm until the last frame. In summary, the timeline feature in your video editing software is a vital hub, facilitating the effective arrangement and modification of your visual, audio or any other media components for the most impactful final product possible.
Frame Rate.
Frames per second, commonly abbreviated as FPS, refers to the number of distinct images or frames that are displayed in a single second of video. A higher FPS value results in smoother motion and reduces blur, while a lower FPS can make movements appear choppy and jerky. Some of the standard frame rates used for video recordings are 24 frames per second, 30 frames per second, and 60 frames per second.
The choice of frame rate depends on the desired end result, with lower frame rates often used in classic films for their unique aesthetic appeal. Higher frame rates, such as 60 frames per second, are commonly used in video games and action-packed videos for their ability to capture fast-paced and dynamic movements with greater clarity and precision. Hence, the choice of frame rate can significantly impact the quality and impact of a video production.
Aspect ratio.
Aspect ratio refers to the proportional relationship between the width and height of your video. This means that it determines the shape and dimensions of your video frames. It is a crucial element to consider when creating or editing videos, as it affects the way in which your video appears on different devices and platforms.
There are several commonly used aspect ratios for videos, including 16:9 and 4:3. Each of these ratios has its own unique characteristics that impact how the video displays, such as the width and height of the video, its orientation, and the amount of space available for content. For instance, the 16:9 aspect ratio is widely used for widescreen TVs and computer monitors, while the 4:3 ratio was commonly used in older TVs and computer monitors.
keyframe.
A parameter is a specific value or setting that controls the behavior or appearance of an effect or animation. It is a crucial aspect in the creation and customization of these visual elements as it enables users to define the way they are displayed or activated at a particular time. Thus, when setting a parameter, you are essentially establishing a clear point in time where a specific effect or animation can be triggered, altered, or stopped to achieve the desired visual effect.
By carefully defining these parameters, designers and animators can create stunning visuals and communicate complex ideas through dynamic, engaging visuals that capture the audience’s attention. Whether used for entertainment, education, or promotional purposes, well-defined parameters are the cornerstone of effective visual communication.
Render.
The process of exporting your edited video project into a final video file can be a crucial step in completing your production. Exporting involves several different stages that allow you to choose the format, resolution, and quality of your final video. It is important to take some time to consider these choices carefully as they can have a significant impact on the overall look and feel of your video.
Additionally, exporting can take some time depending on the length and complexity of your project, so it is important to be patient during this stage of the production process. However, by taking the time to export your project properly, you can ensure that your final video will be of the highest quality and ready to be shared with your audience.
Color Grading.
Color grading is a highly important process in video production that involves making adjustments to the colors and tones in your footage. This is done with the intention of creating a particular look or mood that can enhance the visual experience for the viewer. The process can be accomplished through various methods, including manual color correction, the application of color grading presets, or the use of specialized software.
Proper color grading can impact the overall feel and tone of your video and can be used to evoke a wide range of emotions and reactions from your audience. Whether you’re looking to create a warm and inviting atmosphere or a dark and moody vibe, color grading can help you achieve your desired aesthetic and bring your video to life.
Chroma Key.
Chroma keying, also known as green screen or blue screen, is a powerful video-editing technique that allows you to creatively replace a specific color in a video clip with another image or video. By using specialized software and equipment, you can achieve a seamless integration between your subject and the background. This technique is popularly used in film and television production, as it offers limitless possibilities for creative storytelling and visual effects.
Whether you want to transport your viewers to an exotic location, create a fantasy world, or simply add branding elements to your video, chroma keying empowers you to bring your vision to life in a visually stunning way. In summary, chroma keying is a versatile technique that can elevate the production value of your videos and take your storytelling to the next level!
Masking.
Video editing involves a number of techniques that allow users to create high-quality, visually-engaging content. One such technique is the process of hiding or revealing certain parts of a clip using a specific shape or path, which is an important aspect of producing professional-grade videos.
By utilizing this technique, video editors can dynamically control which parts of a shot are visible, creating stunning visual effects and emphasizing the key points of a video. The process involves setting up a shape or path that defines which parts of the clip will be visible, and then adjusting the opacity or other effects of those parts to create the desired result.
Overall, this technique offers a powerful way for video editors to craft visually-compelling content that is sure to captivate their audience.
Transitions.
The effects that are utilized to transition seamlessly between one clip and the next are known as video transitions. These effects are crucial in video editing as they help in creating a smoother, polished flow in the content. With the use of professional video editing software, you have an array of video transitions to choose from, such as crossfades, dissolves, wipes, and fades, that can be customized to match the tone of your video content.
These effects can be adjusted in terms of speed, length, direction, and placement, to create a unique visual transition from one clip to the next. The right choice of video transition can elevate your video’s storytelling and help maintain viewer engagement throughout. Therefore, it is important to carefully select and place the appropriate video transition to enhance the quality of your video.
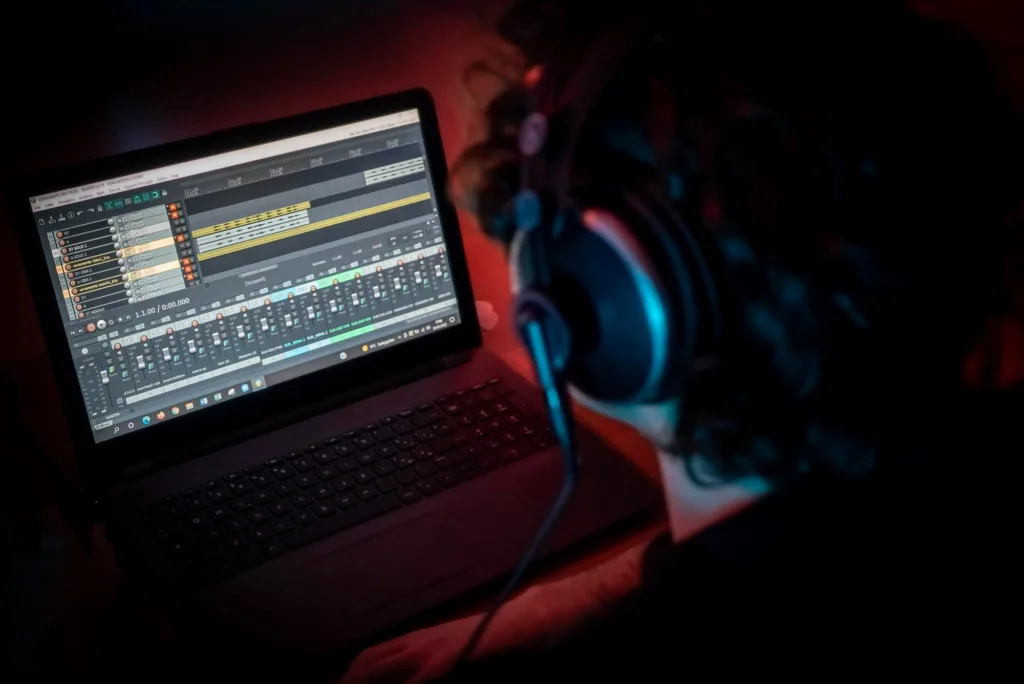
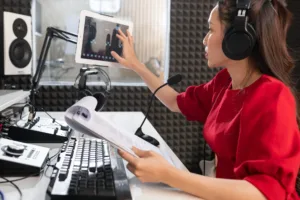
Audio Levels.
When it comes to audio clips, one important aspect to consider is the volume levels. Ensuring that your audio clips have appropriate volume levels can make a significant difference in the overall quality of your content. If the volume levels are too low, your audience may struggle to hear what is being said or miss important details.
Conversely, if the volume levels are too high, it can be uncomfortable for listeners and may distort the sound quality. Therefore, it is crucial to make sure that the volume levels of your audio clips are balanced and consistent throughout your content. This will not only improve the overall listening experience for your audience but also demonstrate your attention to detail and professionalism in your work.
B-Roll.
Additional footage is a valuable cinematographic tool utilized in film and video production. It helps to cut away from the main action or scene in order to add more context, create visual interest, or provide more information to the viewer. This technique is widely used in documentaries, news reports, music videos, and short films to keep the viewer engaged and informed.
By introducing new and different perspectives, additional footage can deepen our understanding of the main events or people in focus. It can show the surroundings, the context of the scene, or the emotions and reactions of other characters or objects within the scene. Additionally, it can offer a more diverse and dynamic visual experience that reinforces the main narrative or theme.
In short, additional footage is a powerful cinematic technique that can enhance a film’s storytelling, provide more context, and engage the viewer on multiple levels.
Compression.
One crucial aspect of optimizing your video files for various purposes is the process of compressing or reducing their size without compromising the quality too much. This process involves some technical knowledge and various tools to make it feasible. You need to choose the best software or app that suits your needs and specifications.
Some of these tools involve transforming your raw video files into more compressed formats like MP4, FLV, AVI, WMV, etc. Besides, you can lower the bitrate, resolution, or frames per second of your videos according to your desired size, quality, and platform. Additionally, you may apply some advanced video editing features like trimming, cropping, or merging specific video clips to reduce unnecessary elements that add up to your file size.
Overall, the goal of video compression is to keep your file size manageable while ensuring optimal video viewing experiences for your audiences.
Non-linear editing.
Non-linear video editing is an amazing technique that provides editors with the flexibility to reorder and edit video clips in a non-linear fashion, offering endless possibilities for creativity. Unlike linear editing, where the video footage has to be placed in a particular sequence to tell the story in a specific way, non-linear editing allows the video editor to shuffle the clips around and experiment with different variations until they achieve their desired outcome.
This technique is ideal for complex and intricate editing projects as it allows for more efficient management of large amounts of footage, saving time and speeding up the editing process. The editor has the option to work on different portions of the footage simultaneously, making it easier to refine and fine-tune the final cut. Non-linear video editing is a must-have skill for any professional video editor who wants to stand out in today’s dynamic video production landscape.
There you have it, folks! The top 15 video editing terms every YouTuber should know. With these terms under your belt, you’ll be able to navigate the world of video editing with ease and confidence. Happy editing!