Categories
For YouTubers

How much watch time is required for monetization on youtube?

How much watch time is required for monetization on youtube?

Hey there, fellow YouTuber! So, monetization on youtube? Are you wondering how much watch time you need to earn some dough from your content? Well, you’re in the right place! In this blog post, we’re going to talk about watch time and monetization, all while keeping it light and fun.

So, how much watch time do you need to monetize your channel? The answer is 4,000 hours of watch time within the last 12 months. Yes, you read that right. That’s 240,000 minutes of watch time. That’s a lot of people watching your content, but don’t worry, it’s not impossible.

But why does YouTube require a certain amount of watch time to monetize your channel? It’s because YouTube wants to ensure that the channels that are making money are actually providing valuable content to their viewers. This ensures that advertisers are getting their money’s worth and that viewers are getting the content they came for.

youtube for monetization

4,000 hours for monetization on youTube.

Consistency is key. Keep a regular upload schedule so that your viewers know when to expect new content.

Promote your videos. Share them on social media, embed them on your website, and tell your friends and family about them.

Engage with your viewers. Respond to comments and create a community around your channel.

Optimize your videos. Use keywords in your titles, descriptions, and tags to make it easier for viewers to find your content.

Create longer videos. The longer your videos are, the more watch time they’ll accumulate.

Remember, it’s not just about hitting that 4,000 hours of watch time. It’s about creating valuable content that people want to watch. If you focus on that, the watch time will come.

So, keep creating and keep hustling, and you’ll get there in no time.

Categories
Production

What is the martini shot in filmmaking?

What is the martini shot in filmmaking?

Lights, camera, action! When it comes to filmmaking, there are a lot of terms to keep track of. From tracking shots to close-ups, it can be hard to keep it all straight. But fear not, my fellow film enthusiasts! In this blog post, we’re going to focus on one particular shot: the martini shot. But first, let’s cover some other important shot names you might hear on set.

Close-Up: A shot that shows a subject’s face or a specific detail.

Medium Shot: A shot that shows the subject from the waist up.

Long Shot: A shot that shows the subject from head to toe or from a distance.

Tracking Shot: A shot in which the camera moves with the subject as they move through the scene.

The Martini Shot.

The martini shot is the final shot of the day. It’s named after the tradition of celebrating the end of a long day of filming with a martini. It’s also known as the “final shot” or the “golden shot.”

What is the martini shot in filmmaking?

The martini shot is important for a few reasons. First, it marks the end of the day’s work and signals to the cast and crew that they can pack up and head home. Second, it’s often used as an opportunity to get creative with the shot, since it doesn’t necessarily need to fit within the continuity of the scene. Finally, it’s a chance to capture a memorable moment that might not fit within the structure of the scene itself.

While the martini shot is certainly an important part of filmmaking, it’s important to remember that every shot has a purpose. Each shot helps to tell the story and convey the emotion of the scene. So whether you’re capturing a close-up or a tracking shot, make sure it serves the story you’re trying to tell.

Now that you know what the martini shot is, and a few other important shot names, you’re ready to take on the world of filmmaking. So go forth, my friends, and create something amazing!

Categories
Production

What is shaky cam and how can you use it in your videos?

What is shaky cam and how can you use it in your videos?

Have you ever watched a movie or a video where the camera seems to be shaking uncontrollably? That’s called “shaky cam,” and it’s a technique that can be used to create a sense of chaos and urgency in your videos. But before you start shaking your camera around like a madman, there are a few things you should know.

First, let’s talk about what shaky cam is. Essentially, it’s a camera technique that simulates the experience of being in the middle of a chaotic or high-energy situation. The camera is held unsteadily, which can create a sense of movement and tension in the footage. You might see shaky cam used in action movies, horror films, or documentaries to create a sense of realism and immediacy.

how can you use shaky cam in your own videos?

Use it sparingly. Shaky cam can be an effective technique, but too much of it can be distracting and disorienting. Use it strategically to highlight moments of high energy or chaos.

Plan ahead. While shaky cam might look like it’s just the result of holding the camera haphazardly, it actually takes careful planning and choreography to execute effectively. Before you start shooting, think about the movements and actions you want to capture and how you can best simulate the experience of being in the middle of them.

What is shaky cam and how can you use it in your videos?

Use stabilization tools. If you’re filming with a traditional camera, consider using a stabilization rig or tripod to help control the camera’s movement. If you’re using a smartphone, there are a number of apps that can help stabilize your footage.

Edit with intention. Shaky cam footage can be difficult to work with in post-production, so it’s important to have a clear idea of how you want to use it before you start editing. Experiment with different effects and techniques to find the look that works best for your project.

Overall, shaky cam can be a fun and effective way to add energy and excitement to your videos. Just remember to use it strategically and with intention, and you’ll be well on your way to creating dynamic and engaging footage.

Categories
For YouTubers

How to make Youtube shorts?

How to make Youtube shorts?

Are you ready to jump on the YouTube Shorts bandwagon? These quick, bite-sized videos have been taking the platform by storm, and it’s not hard to see why. With their vertical format and easy-to-digest content, Shorts are a great way to reach new audiences and grow your channel.

So, how do you make a YouTube Short?

Here are a few tips to get you started:

Keep it short and sweet. As the name suggests, YouTube Shorts are meant to be, well, short. Aim for 60 seconds or less to keep your viewers engaged.

Use a vertical format. Shorts are designed to be viewed on mobile devices, so make sure your video is shot and edited in a vertical format (9:16 aspect ratio).

Get creative with your content. Shorts can be anything from quick tutorials to funny skits to behind-the-scenes glimpses of your life. Think outside the box and have fun with it!

Use catchy music or sound effects. Shorts are often viewed without sound, so make sure your visuals are accompanied by attention-grabbing music or sound effects to keep viewers engaged.

How to make Youtube shorts?

Optimize your video for discoverability. Use relevant hashtags and keywords in your video’s title and description to make it easier for viewers to find.

And if you’re looking for even more inspiration, check out the Shorts created by other creators on the platform. You never know where you might find your next big idea!

So go ahead, grab your phone and start filming. With these tips in mind, you’ll be on your way to creating awesome YouTube Shorts in no time.

Categories
Production

How do I use aspect ratio in filmmaking?

How do I use aspect ratio in filmmaking?

Ah, aspect ratio. It’s one of those filmmaking terms that can seem intimidating at first, but don’t worry – it’s not as complicated as it sounds. In fact, understanding aspect ratio is crucial to making your film look its best.

So, what is aspect ratio? Simply put, it’s the proportion of the width of your video frame to its height. For example, a common aspect ratio is 16:9, which means the width is 16 units and the height is 9 units.

Now, why does aspect ratio matter?

Well, it can affect the way your audience perceives your film. Different aspect ratios can create different moods and visual effects. Here are a few examples:

1.33:1 (also known as 4:3) was once the standard aspect ratio for TV shows and movies. It can create a classic, nostalgic feel.

1.85:1 is a common aspect ratio for modern films. It can create a cinematic, widescreen look.

2.39:1 (also known as “Scope”) is an ultra-widescreen aspect ratio often used for epic, sweeping shots.

How do I use aspect ratio in filmmaking?

So, how do you choose the right aspect ratio for your project?

Think about the story you want to tell and the mood you want to create. A widescreen aspect ratio might be great for an action movie, while a more intimate, square aspect ratio might be better for a drama.

And once you’ve chosen your aspect ratio, make sure you stick with it throughout your film. Changing aspect ratios mid-scene can be jarring for your audience.

Now, there are a few technical things to keep in mind when it comes to aspect ratio. For example, if you’re shooting on a camera with a fixed aspect ratio, you’ll need to crop or letterbox your footage in post-production to achieve the desired aspect ratio. And if you’re distributing your film, you’ll need to consider which aspect ratios are compatible with different platforms.

But don’t let that scare you off – with a little practice, using aspect ratio can be a fun and creative tool for enhancing your filmmaking. So go ahead, play around with different aspect ratios and see what works best for your project!

Categories
For Content Creators

How to use music in film and video projects.

How to use music in film and video projects.

Lights, camera, action…and music! How to use music in film and video projects? That’s right, folks – music is a vital component of any great film or video project. It can set the mood, evoke emotion, and even propel the story forward.

But how do you choose the right music for your project, and how do you use it effectively? Here are a few tips to get you started:

Consider the tone

The music you choose should match the tone of your project. Are you making a lighthearted comedy or a serious drama? Is your video meant to be inspiring or suspenseful? Think about the emotions you want to evoke in your audience and choose music accordingly.

Pay attention to pacing

The tempo and rhythm of the music can affect the pacing of your video. If you want to create a sense of urgency, choose a faster-paced track. If you want to slow things down and create a more contemplative mood, go for something slower.

Use music to create contrast

Sometimes, using music that contrasts with the visuals can create a powerful effect. For example, pairing a sad song with footage of a joyful event can create a bittersweet tone.

How to use music in film and video projects

Consider the lyrics (or lack thereof)

If your project includes dialogue or narration, make sure the music isn’t competing with it. Instrumental tracks are a safe bet, but if you do choose a song with lyrics, make sure they don’t detract from the story.

Don't forget about licensing

Before using any music in your project, make sure you have the legal right to do so. There are plenty of royalty-free music libraries out there, but TuneCutter is the best for price and licensing purposes going forward.

And there you have it – a few tips for using music in your film and video projects. Just remember, music is a powerful tool, so use it wisely!

Categories
Post-Production

What is Ken Burns Effect?

What is Ken Burns Effect?

Are you tired of boring, static images in your videos? Want to add a little flair and pizzazz to your video content? Well, have no fear, the Ken Burns Effect is here!
No, we’re not talking about the director of “The Civil War” documentary. We’re talking about a nifty little technique that adds movement and depth to still images in your video projects.

So, what exactly is the Ken Burns Effect? Simply put, it’s a technique of panning and zooming on still images, creating the illusion of movement and animation. It’s named after the famous documentary filmmaker, who used the technique extensively in his films to bring old photographs to life.

The effect involves zooming in or out on an image, while simultaneously panning across it. This creates a sense of motion and depth, making still images appear more dynamic and engaging.

Slideshows are boring, right?

Think about it – have you ever watched a slideshow of pictures that just seemed to drag on and on? Boring, right? But with the Ken Burns Effect, those same pictures can become much more interesting and visually stimulating.

The beauty of this technique is that it can be applied to a variety of different video projects. Whether you’re creating a slideshow of family photos or a promotional video for your business, the Ken Burns Effect can help elevate your content and make it stand out.

how do you create the Ken Burns Effect?

So, how do you create the Ken Burns Effect in your own video projects? It’s actually quite simple.

First, choose the image you want to apply the effect to. Ideally, you’ll want to choose an image with a strong focal point or subject that you can zoom in on. A landscape or group photo might not work as well as a portrait or close-up shot.

Next, import the image into your video editing software of choice. Most programs, like iMovie or Adobe Premiere, have built-in tools for creating the Ken Burns Effect.

Once you’ve imported the image, select it and click on the “crop” or “transform” tool. This will bring up a menu of options for adjusting the size and position of the image.

To create the effect, you’ll want to set two keyframes – one at the beginning of the clip, and one at the end. These keyframes will mark the starting and ending points of your zoom and pan.

At the first keyframe, zoom in on the image using the “scale” or “zoom” tool. You can also adjust the position of the image within the frame using the “pan” tool.

At the second keyframe, zoom out or return the image to its original size and position.

Finally, adjust the timing and duration of the effect to your liking. You might want to make the zoom and pan faster or slower, depending on the tone and pacing of your video.

And that’s it! With just a few simple steps, you can add a little extra oomph to your still images and make them come alive.

the Ken Burns Effect - Easy right?

Of course, like any video technique, the Ken Burns Effect can be overused or applied inappropriately. You don’t want to use it on every single image in your video, or it might become repetitive and tiresome.

Instead, use it strategically to highlight key moments or to add emphasis to specific images. It’s also a good idea to pair the effect with other visual elements, like text overlays or transitions, to create a more cohesive and polished look.

So, there you have it – the Ken Burns Effect in all its glory. It may seem like a small detail, but it can make a big difference in the overall quality and impact of your video content. Give it a try and see for yourself!

Categories
For Content Creators

How do I edit a TikTok video that engages with millions?

How do I edit a TikTok video that engages with millions?

Ah, TikTok – the land of viral videos and dance crazes. So, you want to create and edit a TikTok video that engages with millions? Let’s get editing!

First things first, start with a clear concept. What’s the hook of your video? Is it a dance challenge, a funny skit, or a quick cooking tutorial? Once you have a concept in mind, film your footage and import it into your editing software of choice (TikTok has its own built-in editing tools, but you can also use external apps like iMovie or Adobe Premiere Rush).

Next, start trimming your footage to keep only the best moments. Aim for a tight, fast-paced edit that keeps viewers engaged from start to finish. Use jump cuts and other creative transitions to keep things interesting.

Add music! Music is a key element of TikTok videos, so choose a track that fits your concept and mood. Use the editing tools to time your cuts and transitions to the beat of the music.

Now it's time to add effects

TikTok has a wide variety of filters and effects built-in, but you can also use external apps to add more advanced effects like color grading or motion graphics. Just be careful not to overdo it – a little goes a long way.

How do I edit a TikTok video that engages with millions?

Finally, add captions and hashtags to make your video easily discoverable. Use popular hashtags related to your concept and include captions that are funny or engaging.

And there you have it – a TikTok video that’s ready to go viral! With a clear concept, tight editing, music, effects, and captions, your video will be sure to engage with millions. So get out there and start creating!

Categories
Reviews

Best Video Cameras under $1000.

Best Video Cameras under $1000.

Looking for an affordable video camera that won't break the bank? You've come to the right place! Here are some of the best video cameras under $1000.

Panasonic Lumix G7

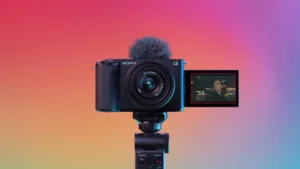
First up, we have the Panasonic Lumix G7. This mirrorless camera is perfect for those just starting out in the world of videography. It shoots 4K video, has a flip-out screen for easy self-shooting, and is compact and lightweight, making it great for on-the-go shooting.

Sony a6400

Next on the list is the Sony a6400. This camera has excellent autofocus, shoots 4K video, and has a tilting screen for easy overhead and low-angle shots. It’s also great for still photography, making it a versatile choice for any content creator.

Canon EOS Rebel T8i

If you’re looking for something a bit more traditional, the Canon EOS Rebel T8i is a great choice. It shoots 4K video, has a fully articulating touchscreen, and is compatible with Canon’s extensive lens lineup. Plus, it has built-in Wi-Fi and Bluetooth for easy sharing and remote control.

DJI Pocket 2

For those who need something even more compact, the DJI Pocket 2 is a handheld camera that shoots 4K video and has built-in gimbal stabilization. It’s great for vlogging or capturing on-the-go footage, and the pocket-sized design means you can take it anywhere.

Blackmagic Pocket Cinema Camera 4K

Last but not least, we have the Blackmagic Pocket Cinema Camera 4K. This camera is a bit pricier than the others on the list, but it’s a powerhouse when it comes to video quality. It shoots 4K video with 13 stops of dynamic range, has a built-in SSD for fast and easy storage, and includes DaVinci Resolve Studio for advanced editing capabilities.

There you have it, folks – some of the best video cameras for under $1000. Whether you’re just starting out or looking to upgrade your gear, these cameras offer great value for the price. So get out there and start shooting!

Categories
Production

How do I make great cinematic shots on an iPhone?

How do I make great cinematic shots on an iPhone?

Are you tired of shooting bland videos on your iPhone? Well, get ready to take your shots to the next level with these tips on how to make great cinematic shots on an iPhone.

First things first, stability is key. Shaky footage can make even the best shots look amateurish, so invest in a tripod or stabilizer to keep your phone steady. This will help you achieve those smooth, cinematic movements that make your shots stand out.

pay attention to your framing

Think about the rule of thirds, and try to place your subject off-center for a more visually pleasing shot. Also, be mindful of your composition – try to include interesting foreground and background elements to add depth to your shot.

Lighting is also crucial for achieving that cinematic look. Avoid shooting in harsh, direct sunlight and opt for softer, diffused light instead. You can achieve this by shooting during golden hour (the hour after sunrise and before sunset), or by using artificial lighting such as a ring light or softbox.

How do I make great cinematic shots on an iphone?

Don't forget about sound!

Audio is just as important as visuals in creating a cinematic experience. Invest in a good quality microphone to capture clear, crisp audio that enhances your footage. Add background soundtrack with amazing tracks from TuneCutter, of course!

Finally, editing is where the magic happens. Take advantage of editing software like iMovie or Adobe Premiere Pro to add color grading, slow-motion, and other effects that enhance the overall cinematic feel of your footage.

So there you have it, folks – with a little bit of know-how and some handy equipment, you can make great cinematic shots on your iPhone. Remember to experiment and have fun, and you’ll be creating professional-looking videos in no time!