Are you tired of boring, static images in your videos? Want to add a little flair and pizzazz to your video content? Well, have no fear, the Ken Burns Effect is here!
No, we’re not talking about the director of “The Civil War” documentary. We’re talking about a nifty little technique that adds movement and depth to still images in your video projects.
So, what exactly is the Ken Burns Effect? Simply put, it’s a technique of panning and zooming on still images, creating the illusion of movement and animation. It’s named after the famous documentary filmmaker, who used the technique extensively in his films to bring old photographs to life.
The effect involves zooming in or out on an image, while simultaneously panning across it. This creates a sense of motion and depth, making still images appear more dynamic and engaging.
Slideshows are boring, right?
Think about it – have you ever watched a slideshow of pictures that just seemed to drag on and on? Boring, right? But with the Ken Burns Effect, those same pictures can become much more interesting and visually stimulating.
The beauty of this technique is that it can be applied to a variety of different video projects. Whether you’re creating a slideshow of family photos or a promotional video for your business, the Ken Burns Effect can help elevate your content and make it stand out.
how do you create the Ken Burns Effect?
So, how do you create the Ken Burns Effect in your own video projects? It’s actually quite simple.
First, choose the image you want to apply the effect to. Ideally, you’ll want to choose an image with a strong focal point or subject that you can zoom in on. A landscape or group photo might not work as well as a portrait or close-up shot.
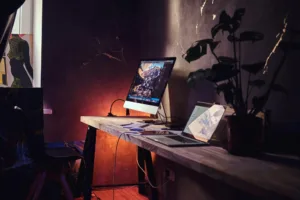
Next, import the image into your video editing software of choice. Most programs, like iMovie or Adobe Premiere, have built-in tools for creating the Ken Burns Effect.
Once you’ve imported the image, select it and click on the “crop” or “transform” tool. This will bring up a menu of options for adjusting the size and position of the image.
To create the effect, you’ll want to set two keyframes – one at the beginning of the clip, and one at the end. These keyframes will mark the starting and ending points of your zoom and pan.
At the first keyframe, zoom in on the image using the “scale” or “zoom” tool. You can also adjust the position of the image within the frame using the “pan” tool.
At the second keyframe, zoom out or return the image to its original size and position.
Finally, adjust the timing and duration of the effect to your liking. You might want to make the zoom and pan faster or slower, depending on the tone and pacing of your video.
And that’s it! With just a few simple steps, you can add a little extra oomph to your still images and make them come alive.
the Ken Burns Effect - Easy right?
Of course, like any video technique, the Ken Burns Effect can be overused or applied inappropriately. You don’t want to use it on every single image in your video, or it might become repetitive and tiresome.
Instead, use it strategically to highlight key moments or to add emphasis to specific images. It’s also a good idea to pair the effect with other visual elements, like text overlays or transitions, to create a more cohesive and polished look.
So, there you have it – the Ken Burns Effect in all its glory. It may seem like a small detail, but it can make a big difference in the overall quality and impact of your video content. Give it a try and see for yourself!